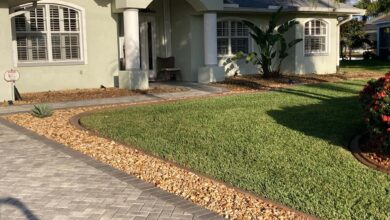
The Ultimate Guide to Sidding Maintenance and Care
The Ultimate Guide to Sidding Maintenance and Care delves into the essential aspects of preserving your home’s exterior siding. From understanding the various siding materials and their unique properties to mastering cleaning, repair, and painting techniques, this guide provides a comprehensive approach to ensuring long-lasting beauty and protection. We’ll explore preventative measures, advanced repair strategies, and even when to call in a professional, empowering you to make informed decisions about your siding’s care.
Whether you’re a seasoned DIY enthusiast or a homeowner new to home maintenance, this guide offers practical advice and step-by-step instructions, making the process manageable and rewarding. Learn to identify potential problems early, understand the best cleaning methods for different materials, and master painting techniques to achieve a professional finish. Ultimately, this guide equips you with the knowledge to keep your siding looking its best for years to come.


Understanding Sidding
Choosing the right siding for your home is a crucial decision impacting both aesthetics and long-term maintenance. This section details the various siding materials available, outlining their advantages, disadvantages, and cost implications to help you make an informed choice. Understanding the properties of each material will allow you to select the best option for your budget and the specific climate conditions of your location.
Siding Materials: A Comprehensive Overview
Several materials are commonly used for house siding, each possessing unique characteristics. The selection process should consider factors such as budget, desired lifespan, maintenance requirements, and aesthetic preferences.
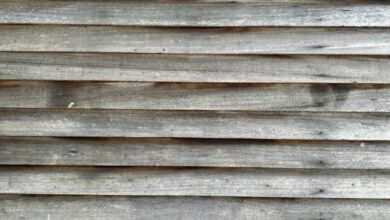
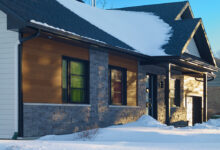
Wood Siding
Wood siding offers a classic, natural look and can significantly enhance a home’s curb appeal. However, it requires more maintenance than other options.
Advantages: Natural beauty, relatively easy to repair, can be painted or stained to match any style.
Disadvantages: Susceptible to rot, insect infestation, and requires regular painting or staining to prevent damage. Higher initial and long-term maintenance costs compared to other materials.
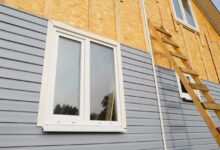
Vinyl Siding
Vinyl siding is a popular choice due to its affordability and low maintenance. Its durability and resistance to weather damage make it a practical option for many homeowners.
Advantages: Low cost, easy to install and maintain, resistant to moisture and insects, long lifespan.
Disadvantages: Can fade or become brittle in intense sunlight, susceptible to damage from impact, may not be as aesthetically pleasing as wood or other materials.
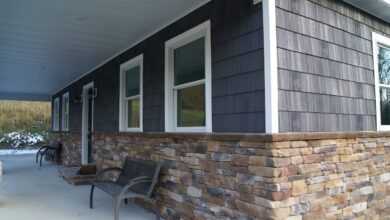
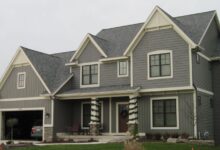
Fiber Cement Siding
Fiber cement siding combines the durability of cement with the workability of wood. It’s a strong, low-maintenance option that offers excellent protection against the elements.
Advantages: Highly durable, fire-resistant, resists rot, insects, and moisture, low maintenance.
Disadvantages: More expensive than vinyl siding, can be more difficult to install, requires special tools for cutting and installation, can be heavy.
Metal Siding
Metal siding, often made of aluminum or steel, offers exceptional durability and longevity. It’s highly resistant to fire, insects, and moisture damage.
Advantages: Extremely durable, fire-resistant, low maintenance, long lifespan, available in various colors and finishes.
Disadvantages: Can dent or scratch easily, may be more expensive than vinyl or wood siding, can be noisy during rain or hail.
Siding Material Comparison
The following table summarizes the key characteristics of different siding materials:
| Siding Type | Lifespan (Years) | Maintenance Requirements | Typical Cost (per sq ft) |
|---|---|---|---|
| Wood | 20-50 (depending on maintenance) | Regular painting/staining, occasional repairs | $3-$10 |
| Vinyl | 30-50 | Minimal; occasional cleaning | $1-$5 |
| Fiber Cement | 50+ | Minimal; occasional cleaning | $4-$12 |
| Metal | 50+ | Minimal; occasional cleaning | $5-$15 |
Preparing for Sidding Maintenance
Proper preparation is crucial for efficient and effective sidding maintenance. Taking the time to thoroughly inspect your sidding and prepare your workspace will ensure a safer and more successful project, minimizing the risk of damage and maximizing the lifespan of your sidding. This section will guide you through the necessary steps to ensure you’re ready to tackle any sidding maintenance task.
Sidding Inspection for Damage
A thorough inspection is the first step in any sidding maintenance plan. This involves systematically examining your sidding for various types of damage. Begin by visually inspecting the entire surface of your sidding, paying close attention to areas that are most exposed to the elements, such as corners and edges.
- Check for Cracks: Look for any cracks or splits in the sidding boards. Small cracks can be repaired, but larger cracks may require board replacement. Note the size and location of all cracks.
- Identify Loose Boards: Gently push and pull on each board to check for looseness. Loose boards indicate a potential problem with the underlying fastening system and need attention to prevent further damage or detachment.
- Inspect for Insect Infestation: Look for signs of insect activity, such as small holes, sawdust, or insect droppings. These signs often indicate wood-boring insects that can cause significant damage if left untreated. Pay particular attention to areas around windows and doors where insects often enter.
- Assess for Rot and Decay: Check for signs of rot or decay, indicated by soft, spongy wood, discoloration, or a musty odor. These areas require immediate attention to prevent further spread of damage.
- Examine for Water Damage: Look for any signs of water damage, such as swelling, discoloration, or warping of the sidding. Water damage can weaken the sidding and make it more susceptible to further damage.
Preparing the Work Area
A well-prepared work area ensures safety and efficiency. Before starting any sidding maintenance, take the time to organize your tools and materials and implement safety measures.
- Safety Gear: Wear appropriate safety gear, including safety glasses, gloves, and a dust mask. If working at heights, use a safety harness and follow all relevant safety regulations.
- Tools and Materials: Gather all necessary tools and materials beforehand. This might include a ladder, scraper, putty knife, brushes, paint, sealant, replacement boards, screws, and other relevant tools depending on the repairs needed.
- Work Area Protection: Protect the surrounding area from damage using drop cloths or tarps. Clear the area of any obstacles that could cause tripping hazards.
- Waste Disposal: Have a plan for disposing of debris and waste materials properly and safely, in accordance with local regulations.
Cleaning Techniques for Sidding
Proper cleaning is essential to remove dirt, mildew, and other debris that can damage the sidding and hinder the effectiveness of repairs. Cleaning also allows for a better assessment of the sidding’s condition.
Cleaning techniques will vary depending on the type of sidding material. For example, pressure washing is effective for some sidding types but can damage others. Always refer to the manufacturer’s recommendations for cleaning your specific sidding. Generally, start with a gentle cleaning method and progress to more aggressive methods only if necessary. A solution of mild detergent and water, applied with a soft brush, is often sufficient for removing surface dirt and grime. For mildew, a solution of bleach and water (always following manufacturer’s dilution instructions) may be necessary, followed by thorough rinsing. Always allow the sidding to dry completely before beginning any repairs. Using a garden hose with a nozzle that provides a gentle spray is recommended for rinsing. Avoid using high-pressure settings which can damage the sidding.
Cleaning and Repairing Sidding
Maintaining the beauty and integrity of your sidding requires regular cleaning and prompt repairs. Neglecting these aspects can lead to significant damage and costly repairs down the line. This section details the proper methods for cleaning various sidding materials and repairing common types of damage. Remember to always prioritize safety by wearing appropriate personal protective equipment (PPE) such as gloves and eye protection during cleaning and repair work.
Cleaning Different Sidding Materials
Effective cleaning methods vary depending on the sidding material. Using the wrong cleaning solution or technique can damage the surface, leading to premature deterioration. The following outlines appropriate cleaning methods for common sidding types.
- Wood Sidding: Begin by gently brushing away loose dirt and debris with a soft-bristled brush. For cleaning, mix a mild detergent solution (a few drops of dish soap in a bucket of warm water). Apply the solution with a soft sponge or brush, scrubbing gently to avoid scratching the wood. Rinse thoroughly with clean water and allow to air dry completely. For more stubborn stains, consider using a pressure washer set to a low pressure setting, maintaining a safe distance to prevent damage.
- Vinyl Sidding: Vinyl sidding is relatively low-maintenance. A simple wash with a garden hose and a soft brush is often sufficient. For tougher stains, use a solution of mild detergent and water, applying it with a soft sponge or brush. Rinse thoroughly and allow to air dry. Avoid harsh chemicals or abrasive cleaners, as these can damage the vinyl’s finish.
- Fiber Cement Sidding: Fiber cement sidding is durable and resistant to many stains. Cleaning typically involves using a pressure washer set to a low pressure setting, combined with a solution of mild detergent and water. Always maintain a safe distance to prevent damage. For stubborn stains, a stiff-bristled brush can be used, but avoid excessive scrubbing to prevent scratching. Rinse thoroughly and allow to dry completely.
Repairing Damaged Sidding
Promptly addressing minor damage can prevent larger, more costly repairs later. This section details methods for repairing common sidding issues.
Repairing Damaged Wood Sidding
Repairing damaged wood sidding often involves replacing damaged boards or patching cracks. For replacing a board, carefully remove the damaged section using a pry bar and hammer, ensuring not to damage surrounding boards. Install a replacement board of the same type and size, securing it with appropriate nails or screws. For patching cracks, use wood filler designed for exterior use. Apply the filler, ensuring it’s level with the surrounding surface. Once dry, sand smooth and apply a sealant or paint to match the existing finish.
Repairing Damaged Vinyl Sidding
Vinyl sidding is relatively resistant to damage, but cracks or holes can occur. Small cracks can often be repaired with vinyl caulk, ensuring it’s applied smoothly and evenly. Larger holes may require replacing the entire damaged section. This often involves carefully removing the damaged piece and installing a new one, ensuring a snug fit and proper sealing.
Repairing Damaged Fiber Cement Sidding
Fiber cement sidding is durable, but cracks or chips can occur. Small cracks can be filled with a high-quality exterior-grade caulk. For larger damage, replacement of the damaged section is usually necessary. This involves careful removal and installation of a new piece, ensuring proper sealing and alignment. For patching larger holes, fiber cement patching compound is available and can be applied following manufacturer’s instructions. Always ensure proper curing time before painting or sealing.
Painting and Protecting Sidding
Protecting your sidding with paint not only enhances its aesthetic appeal but also significantly extends its lifespan, safeguarding it from the elements and preventing costly repairs. Proper preparation and the selection of suitable paints are crucial for a long-lasting, beautiful finish. This section details the best practices for painting and protecting your sidding.
Preparing Sidding Surfaces for Painting
Thorough preparation is paramount for a successful paint job. Neglecting this step can lead to premature paint failure and necessitate costly rework. The process involves cleaning, priming, and sanding the sidding surface to create an optimal base for the paint to adhere to. First, the sidding must be meticulously cleaned to remove all dirt, debris, mildew, and loose paint. Pressure washing is often effective, but care should be taken to avoid damaging the sidding material. After cleaning, allow the sidding to dry completely. Next, apply a primer specifically formulated for the type of sidding and paint being used. Primers improve paint adhesion, enhance color consistency, and often provide additional protection against moisture. Finally, lightly sand the primed surface to create a smooth finish, removing any imperfections before painting.
Choosing Appropriate Paints and Sealants
The choice of paint and sealant depends largely on the sidding material (e.g., wood, vinyl, fiber cement) and the local climate. For wood sidding, oil-based paints offer superior protection against moisture, but they take longer to dry and may emit stronger fumes. Water-based acrylic paints are a more environmentally friendly alternative, offering good durability and faster drying times. For vinyl and fiber cement sidding, acrylic paints are generally preferred due to their flexibility and ability to withstand expansion and contraction. In regions with harsh weather conditions, such as extreme heat or frequent rain, a high-quality exterior paint with excellent UV protection is crucial. A sealant can further enhance protection, particularly for wood sidding, preventing moisture absorption and reducing the risk of rot and decay.
Step-by-Step Guide for Painting Sidding
Painting sidding requires a systematic approach to ensure a professional and long-lasting finish. Follow these steps for optimal results:
- Preparation: Ensure the sidding is clean, dry, and primed as described above.
- Protection: Cover surrounding areas (windows, landscaping, etc.) with drop cloths or painter’s tape to prevent accidental paint spills.
- Painting Technique: Use a high-quality brush or roller designed for exterior use. Apply thin, even coats, working in the direction of the wood grain for wood sidding. Avoid overloading the brush or roller to prevent drips and runs.
- Multiple Coats: Allow each coat to dry completely before applying the next. Two coats are generally recommended for optimal coverage and protection.
- Clean-up: Clean brushes and rollers immediately after use with the appropriate solvent (water for water-based paints, mineral spirits for oil-based paints).
Comparison of Different Paint Types
| Paint Type | Durability | Moisture Resistance | Drying Time | VOCs | Cost |
|---|---|---|---|---|---|
| Oil-based | High | High | Slow | High | Moderate to High |
| Acrylic (Water-based) | Moderate to High | Moderate to High | Fast | Low | Moderate |
| 100% Acrylic | High | High | Fast | Low | High |
Preventing Future Sidding Problems
Proactive maintenance is key to extending the lifespan of your sidding and maintaining its aesthetic appeal. By understanding the common causes of damage and implementing preventative measures, you can significantly reduce the need for costly repairs and replacements down the line. This section will outline strategies to protect your sidding investment and keep it looking its best for years to come.
Preventing future sidding problems requires a multi-pronged approach focusing on minimizing exposure to damaging elements and implementing regular maintenance routines. Neglecting these steps can lead to significant deterioration, requiring extensive and expensive repairs. A proactive strategy will save both time and money in the long run.
Common Causes of Sidding Damage
Several factors contribute to sidding damage and deterioration. Understanding these causes allows for targeted preventative measures. Moisture intrusion, insect infestations, and exposure to extreme weather conditions are among the most significant threats. For instance, prolonged exposure to moisture can lead to rot and fungal growth, while insect activity can compromise the structural integrity of the sidding. Severe weather events, such as hailstorms or strong winds, can cause physical damage, such as dents, cracks, and loose boards.
Preventative Maintenance Strategies
Regular inspections are crucial for early detection of potential problems. Conduct thorough visual inspections at least twice a year, in spring and fall, paying close attention to areas prone to moisture accumulation, such as corners and joints. Look for signs of damage such as cracks, warping, discoloration, or insect activity. Prompt attention to minor issues can prevent them from escalating into major problems. Cleaning the sidding regularly removes dirt, debris, and mold, which can contribute to deterioration. Pressure washing can be effective but should be done carefully to avoid damaging the sidding. Applying a high-quality sealant protects the sidding from moisture and UV damage, extending its lifespan significantly. The frequency of sealing depends on the type of sidding and climate, but generally, every 2-3 years is recommended.
The Importance of Proper Ventilation
Adequate ventilation is critical in preventing moisture buildup behind the sidding. Moisture trapped behind the sidding can lead to rot, mold growth, and other structural issues. Properly functioning soffit vents and ridge vents ensure air circulation, allowing moisture to escape. Ensure that vents are not blocked by debris or insulation. Consider adding additional vents if necessary, particularly in areas with high humidity or limited air circulation. Regularly inspect and clean vents to maintain optimal airflow. Poor ventilation is a major contributor to sidding problems, often overlooked until significant damage has already occurred. Addressing ventilation early can significantly extend the life of your sidding.
Advanced Sidding Maintenance Techniques
Addressing more extensive siding damage requires specialized knowledge and techniques beyond basic cleaning and minor repairs. This section details approaches for tackling significant issues and the decision-making process involved in choosing between DIY solutions and professional assistance.
Complex siding problems, such as extensive water damage or structural issues affecting the underlying wall, demand a more comprehensive approach than simple repairs. These problems often require a deeper understanding of building materials and construction methods to ensure lasting solutions. Ignoring significant damage can lead to escalating costs and more extensive repairs down the line, potentially compromising the structural integrity of your home.
Repairing Significant Water Damage
Water damage to siding can range from minor discoloration to severe rot and structural compromise. The extent of the damage dictates the repair method. Superficial water stains might only require cleaning and repainting. However, rotted wood siding sections require complete replacement. This involves carefully removing the damaged area, ensuring the underlying structure is sound, and installing new siding that matches the existing material. For significant water intrusion, addressing the source of the leak—faulty flashing, damaged gutters, or compromised roofing—is crucial to prevent recurrence.
Addressing Structural Issues in Siding
Structural problems impacting siding, such as foundation settling or wall framing issues, are serious and require expert assessment. These problems can manifest as bulging, cracking, or uneven siding. Simply replacing the siding without addressing the underlying structural cause will only lead to recurring issues. A structural engineer or experienced contractor should be consulted to diagnose the root cause and develop a comprehensive repair plan, which may involve foundation stabilization or framing repairs before any siding work begins.
Benefits and Drawbacks of Hiring a Professional
Hiring a professional for major siding repairs or replacements offers several advantages. Professionals possess the expertise, tools, and experience to handle complex repairs efficiently and effectively. They can accurately assess the extent of damage, select appropriate materials, and ensure proper installation, leading to longer-lasting results and potentially saving money in the long run by preventing future problems. However, professional services come at a higher cost compared to DIY repairs. Choosing between DIY and professional help depends on the complexity of the damage, your skills and experience, and your budget.
Decision-Making Flowchart for Siding Repair
The following flowchart aids in determining whether a DIY approach or professional assistance is appropriate for your siding repair needs:
[Imagine a flowchart here. The flowchart would start with a decision box: “Extent of Siding Damage: Minor or Major?” A “Minor” branch would lead to a box: “DIY Skills and Time Available? Yes/No.” “Yes” would lead to “Proceed with DIY Repair,” while “No” would lead to “Consult Professional.” A “Major” branch would lead directly to “Consult Professional”. This flowchart visually represents the decision-making process.]
Illustrative Examples of Sidding Issues and Solutions
This section details common sidding problems, their underlying causes, and effective repair strategies. Understanding these issues will empower you to proactively maintain your sidding and prevent costly repairs down the line. We will explore several scenarios, providing detailed descriptions to aid in identification and resolution.
Warping Sidding
Warping, characterized by a buckling or bending of the sidding boards, often results from moisture absorption. This can stem from inadequate ventilation behind the sidding, exposure to prolonged rainfall without proper drainage, or even insufficiently dried lumber used during installation. The warping can be subtle, manifesting as slight bowing, or severe, leading to gaps and compromised structural integrity. Repairing warped sidding often requires replacing the affected boards. This involves carefully removing the damaged piece, ensuring the underlying structure is sound, and installing a new board of the same dimensions and material, paying close attention to proper fastening and alignment. In less severe cases, carefully applying clamps and allowing the wood to dry may help to correct the warping, but this is only effective in the early stages.
Cracked Sidding
Cracks in sidding can range from hairline fissures to significant splits. These are often caused by age, exposure to extreme temperatures (causing expansion and contraction), or physical impact. The type of sidding material also plays a role; some materials are more prone to cracking than others. Repairing cracks depends on their severity and location. Small cracks might be filled with high-quality wood filler, carefully matched to the sidding’s color and sanded smooth for an invisible repair. Larger cracks may necessitate replacing the affected section, using the same method as described for warped sidding. Preventative measures include regular inspections and prompt addressing of minor cracks before they worsen.
Discoloration of Sidding
Discoloration can manifest in various ways, including fading, streaking, or the development of mildew or mold. Fading is often due to prolonged sun exposure, while streaking can result from water runoff carrying dirt and other debris. Mildew and mold thrive in damp environments. Cleaning is the first step in addressing discoloration. For mildew and mold, a solution of bleach and water (following manufacturer’s instructions carefully) can be effective, but always test in an inconspicuous area first. For general cleaning, a pressure washer can be helpful, but use caution to avoid damaging the sidding. A fresh coat of paint or stain can restore the sidding’s original color and protect it from further discoloration. Regular cleaning and proper ventilation can prevent future problems.
Rotting Sidding
Rotting sidding is a serious issue often caused by prolonged exposure to moisture. This can stem from poor drainage, leaking gutters, or damage to the underlying sheathing. The affected wood will become soft, spongy, and may develop a dark discoloration. Repairing rot requires removing the affected area completely, down to the sound wood. The cavity is then treated with a wood preservative before installing a replacement piece of the same material and dimensions. Preventing rotting involves addressing moisture issues promptly and ensuring proper ventilation behind the sidding. Regular inspections, particularly in areas prone to moisture buildup, are crucial for early detection and prevention.
Concluding Remarks
Maintaining your home’s siding is a crucial aspect of preserving its value and curb appeal. This Ultimate Guide has provided you with the knowledge and tools to tackle various siding maintenance tasks, from routine cleaning to more complex repairs. By understanding the different siding materials, implementing preventative measures, and knowing when to seek professional assistance, you can significantly extend the life of your siding and maintain the beauty of your home. Remember, regular inspections and proactive maintenance are key to preventing costly repairs down the line, ensuring your investment remains protected and aesthetically pleasing for years to come.