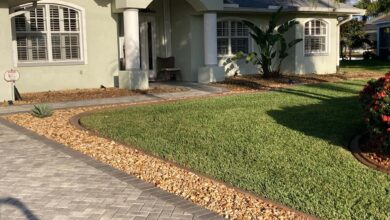
How to Save Money on Siding Installation Without Sacrificing Quality
How to Save Money on Siding Installation Without Sacrificing Quality is a question many homeowners grapple with. This guide provides practical strategies for significantly reducing costs without compromising the aesthetic appeal and longevity of your home’s exterior. We’ll explore various siding materials, installation methods, and project management techniques to help you achieve both cost-effectiveness and high-quality results. From understanding the factors that influence siding costs to negotiating with contractors and sourcing materials efficiently, we’ll equip you with the knowledge to make informed decisions and save money on your siding project.
This comprehensive guide covers everything from selecting cost-effective siding materials and optimizing labor costs to managing the project timeline and maintaining siding quality. We will compare different siding options, weigh the pros and cons of DIY versus professional installation, and offer practical tips for negotiating fair prices and avoiding hidden costs. By following the steps outlined in this guide, you can confidently embark on your siding project knowing you’re making smart, budget-friendly choices.


Understanding Siding Costs
Siding installation costs can vary significantly depending on several factors. Understanding these factors is crucial for budgeting effectively and making informed decisions about your home improvement project. Failing to account for these variables can lead to unexpected expenses and project delays.
Siding material, labor costs, and the complexity of the job are the primary drivers of overall expense. Additional factors, such as the size of your home, the existing condition of your walls, and regional differences in material and labor prices, also play a significant role. Careful planning and research can help you manage these costs effectively.
Siding Material Costs
The type of siding you choose significantly impacts the overall project cost. Vinyl siding, a popular choice for its affordability and low maintenance, generally ranges from $3 to $12 per square foot, including installation. Wood siding, offering a more traditional and aesthetically pleasing look, typically costs between $7 and $25 per square foot, depending on the type of wood and the complexity of the installation. Fiber cement siding, known for its durability and fire resistance, falls within a broader price range of $8 to $20 per square foot, influenced by the specific product features and labor requirements. These figures are estimates and can vary based on location and specific contractor pricing. For example, a homeowner in a rural area might experience higher costs due to transportation of materials.
Labor Costs
Labor costs constitute a substantial portion of the total siding installation expense. The complexity of the project significantly affects the amount of labor required. Factors like the home’s size, the need for repairs to the underlying wall structure, and the removal of existing siding all contribute to increased labor costs. Furthermore, regional variations in labor rates can impact the overall price. A project in a high-cost labor market will naturally command a higher price than a similar project in an area with lower labor costs. It’s essential to obtain detailed breakdowns of labor costs from multiple contractors to ensure you are getting a fair price.
Obtaining Multiple Quotes
Securing multiple quotes from reputable contractors is essential for comparing prices and services. Start by identifying at least three to five contractors with proven experience and positive reviews. Request detailed written estimates that clearly outline the scope of work, materials used, and labor costs. Ensure that all quotes are based on the same specifications to facilitate accurate comparison. Don’t hesitate to ask clarifying questions about the materials, the installation process, and the warranty offered. Comparing these detailed quotes allows for a thorough evaluation of value and helps you select the contractor who best meets your needs and budget.
Choosing Cost-Effective Siding Materials
Selecting the right siding material is crucial for balancing initial investment with long-term costs and aesthetic appeal. Understanding the price-to-performance ratio of various options allows homeowners to make informed decisions that align with their budget and desired outcome. This section will compare common siding materials, considering their initial cost, lifespan, and maintenance requirements.
Siding Material Comparison: Price, Performance, and Longevity
Different siding materials offer varying levels of durability, aesthetic appeal, and maintenance needs. This directly impacts the overall cost of ownership over the siding’s lifespan. While initial costs may differ significantly, factoring in long-term maintenance and replacement expenses provides a more comprehensive understanding of true value.
Long-Term Maintenance Costs of Various Siding Materials
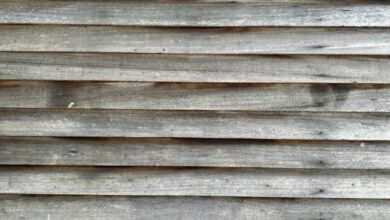
The maintenance requirements for each siding type significantly impact the total cost of ownership. Regular cleaning, painting, or repairs can add up over time. For instance, wood siding requires periodic repainting and potential repairs for rot or insect damage, while vinyl siding generally requires minimal maintenance but may be susceptible to damage from impact. Understanding these nuances is essential for budget planning.
Comparison Table: Siding Material Attributes
The following table summarizes the key attributes of four common siding materials: vinyl, fiber cement, wood, and aluminum. These figures are estimates and can vary based on factors like quality, installation costs, and geographic location.
| Siding Material | Initial Cost (per sq ft – estimate) | Lifespan (Years) | Maintenance |
|---|---|---|---|
| Vinyl | $3-$8 | 20-40 | Low – occasional cleaning |
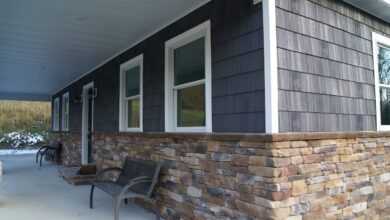
| Fiber Cement | $8-$15 | 30-50 | Moderate – periodic painting or staining may be needed |
| Wood | $10-$20+ | 20-30+ (with proper maintenance) | High – regular painting, staining, and potential repairs for rot or insect damage |
| Aluminum | $6-$12 | 30-50 | Low – occasional cleaning, may require repainting depending on finish |
DIY vs. Professional Installation
The decision of whether to install your siding yourself or hire a professional significantly impacts both the cost and the outcome of your project. While DIY offers the potential for substantial savings, it’s crucial to carefully weigh the advantages and disadvantages before embarking on this potentially complex undertaking. Understanding the nuances of each approach will help you make an informed decision that aligns with your skills, budget, and risk tolerance.
DIY siding installation can seem appealing, primarily due to the potential for significant cost savings on labor. However, this approach carries inherent risks that can negate any financial advantages if not properly managed. A successful DIY project requires a significant time commitment, specialized tools, and a thorough understanding of building techniques and safety procedures.
DIY Siding Installation: Advantages and Disadvantages
The allure of DIY siding installation lies primarily in the potential to save on labor costs, a significant portion of the overall project expense. However, this cost saving comes with several potential drawbacks. Successfully completing a DIY siding installation requires a combination of skills, time, and the right tools. Lacking any one of these elements can lead to significant problems, potentially costing more in the long run due to repairs or needing to hire a professional to correct mistakes.
Potential Risks and Hidden Costs of DIY Installation
Attempting a DIY siding installation without adequate experience or preparation carries considerable risk. Improper installation can lead to issues such as water damage, structural problems, and even safety hazards. These problems can be costly to repair, potentially exceeding the initial savings from DIY. For example, incorrectly installed siding might lead to water intrusion, causing rot in the underlying structure, requiring extensive and expensive repairs. Furthermore, using inferior materials or employing incorrect techniques can void warranties, leaving you with significant financial responsibility. Hidden costs can also arise from the need for additional tools or materials that were not initially accounted for. Unexpected complexities in the existing wall structure or unforeseen obstacles can also increase the project’s time and expense.
Professional Installation Labor Costs
The cost of professional siding installation varies significantly based on several factors, including the installer’s experience, the complexity of the project, and the location. Generally, experienced and reputable installers command higher hourly rates or project fees than less experienced contractors. For instance, a highly experienced installer with a proven track record might charge $50-$80 per hour or more, while a less experienced contractor might charge $30-$50 per hour. The total labor cost will also depend on the size and complexity of the house and the type of siding being installed. A large, multi-story house with intricate architectural details will naturally require more labor than a smaller, simpler home. Obtaining multiple quotes from different contractors is crucial for comparing prices and assessing the value offered by each. It’s important to remember that the cheapest option isn’t always the best; selecting a qualified and insured professional is crucial to protect your investment and ensure a quality installation.
Optimizing Labor Costs
Labor costs represent a significant portion of total siding installation expenses. By employing strategic planning and clear communication, homeowners can substantially reduce these costs without compromising the quality of the work. This involves skillful negotiation with contractors, efficient project management, and precise definition of the project scope.
Effectively managing labor costs requires a multifaceted approach. This includes negotiating favorable rates with contractors, streamlining the installation process to minimize labor hours, and meticulously defining the project scope to prevent unexpected expenses. These strategies, when implemented effectively, can result in considerable savings without sacrificing the quality of the final product.
Negotiating Fair Prices with Contractors
Securing competitive pricing from contractors involves more than simply comparing quotes. It requires understanding the factors that influence pricing and engaging in constructive negotiations. This includes clearly outlining your project needs, comparing detailed proposals from multiple contractors, and understanding the different pricing models contractors may use (e.g., hourly rate versus per-square-foot pricing). Asking for a breakdown of labor costs versus material costs can also provide valuable insights.
For example, instead of simply accepting the first quote received, request detailed breakdowns of the labor costs from at least three different contractors. This will allow you to compare not only the overall price but also the hourly rates and the estimated number of labor hours required. If one contractor’s labor cost is significantly higher than the others, inquire about the reason for the difference. This could uncover factors such as experience level, insurance coverage, or included services.
Streamlining the Installation Process
A well-organized project site and clear communication can significantly reduce installation time, leading to lower labor costs. This includes ensuring easy access to the work area, providing necessary utilities, and facilitating efficient material handling. Proper preparation before the installation begins is crucial.
For instance, removing obstacles like overgrown bushes or cluttered areas around the house will allow contractors to move freely and work more efficiently. Similarly, providing clear access to water and electricity sources will eliminate delays. Pre-planning and organizing materials in an easily accessible location can further contribute to a smoother and faster installation process.
Defining the Scope of Work
A clearly defined scope of work is crucial to avoid unexpected charges. This involves creating a detailed written agreement that specifies every aspect of the project, including materials, labor, timelines, and payment schedules. Ambiguity in the agreement can lead to disputes and additional costs.
For example, the agreement should explicitly state the type and quantity of siding materials, the specific areas to be sided, the method of installation, any necessary repairs or prep work (such as removing old siding or repairing damaged areas), and the expected completion date. Include specific details, such as the number of windows and doors to be sided around, and any special features that may require additional labor, like intricate trim work or difficult-to-access areas. Photographs of the areas to be sided can also help clarify the scope of work and minimize potential misunderstandings.
Sourcing Materials Efficiently
Securing the right siding materials at the best possible price is crucial for staying within budget without compromising quality. Finding reputable suppliers who offer competitive pricing requires a strategic approach, and understanding the advantages of bulk purchasing can significantly impact your overall costs. This section outlines effective strategies for sourcing your siding materials efficiently.
Finding Reputable Suppliers Offering Competitive Pricing involves researching local lumber yards, home improvement stores, and online suppliers. Begin by checking online reviews and ratings to gauge the reputation and reliability of potential suppliers. Look for businesses with a history of positive customer feedback and a strong commitment to quality products. Directly contacting multiple suppliers to request quotes is essential for comparing prices and assessing their services. Don’t hesitate to inquire about any discounts or bulk purchasing options available. Consider factors beyond price, such as delivery fees, lead times, and return policies, to get a complete picture of the total cost.
Bulk Purchasing Advantages
Purchasing siding materials in bulk often leads to significant cost savings. Suppliers frequently offer discounts for larger orders, effectively reducing the per-unit price. This is especially true for standardized siding panels. For example, purchasing 1000 square feet of siding might result in a 10-15% discount compared to buying the same material in smaller quantities. However, it’s crucial to carefully estimate your siding needs to avoid overspending on excess materials. Accurate measurements and a detailed plan are essential to determine the precise quantity required. Remember to factor in potential waste during installation to ensure you have enough materials.
Comparing Prices from Different Suppliers
A systematic approach to comparing prices is key to finding the best deal. Begin by creating a spreadsheet or using a price comparison tool to organize the information you gather. For each supplier, record the price per unit (e.g., per square foot), the total cost, any applicable discounts, delivery fees, and estimated lead times. Pay close attention to the specific type and quality of siding being offered, as seemingly lower prices might reflect inferior materials. Consider using a consistent unit of measurement (e.g., square feet) when comparing prices to ensure an accurate comparison. After compiling the data, analyze the total cost of each option, including all associated fees, to determine the most cost-effective supplier. This detailed comparison will allow for an informed decision that prioritizes both price and quality.
Managing the Project Timeline
Effective project planning and scheduling are crucial for saving money on siding installation. Delays lead to increased labor costs, potential material price fluctuations, and extended project disruption. A well-defined timeline minimizes these risks and allows for efficient resource allocation.
A realistic project timeline should account for all phases of the installation, from initial planning to final cleanup. It should also incorporate buffer time to accommodate unforeseen circumstances, such as inclement weather or material delivery delays. Failing to account for these variables can significantly impact the overall cost and timeline. A carefully crafted schedule provides a roadmap to keep the project on track and within budget.
Project Timeline Development
Creating a realistic timeline involves breaking down the project into manageable stages. Each stage should have a clearly defined scope of work and a reasonable estimated duration. This process allows for better monitoring of progress and easier identification of potential bottlenecks. Consider using project management software or a simple spreadsheet to track progress and adjust the timeline as needed. Regular review and updates are essential to ensure the project remains on schedule.
Sample Project Timeline
The following is a sample project timeline for a typical siding installation. Actual durations may vary depending on project size, complexity, and weather conditions. This example assumes a medium-sized single-family home.
- Pre-Installation Phase (2 weeks): This includes securing necessary permits, finalizing material orders, and scheduling the crew. It also encompasses detailed site preparation, such as removing existing siding and debris.
- Siding Installation (3-4 weeks): This is the main phase, involving the actual installation of the new siding. The duration depends on the size of the house and the type of siding chosen. This phase should account for potential weather delays.
- Finishing and Cleanup (1 week): This involves final inspections, caulking, trim work, and thorough cleanup of the worksite. This phase ensures a professional and finished look.
- Contingency Buffer (1 week): This buffer allows for unexpected delays, such as material shortages, equipment malfunctions, or unfavorable weather conditions. It is crucial for maintaining the overall project timeline.
Timeline Optimization Strategies
To optimize the project timeline and minimize costs, consider these strategies:
- Prioritize tasks: Identify critical path activities and prioritize them to minimize delays.
- Communicate effectively: Maintain clear and consistent communication with contractors, suppliers, and inspectors to avoid misunderstandings and delays.
- Use efficient tools and techniques: Employ time-saving techniques and tools to expedite the installation process.
- Weather monitoring: Closely monitor weather forecasts and schedule work accordingly to avoid weather-related delays.
Maintaining Siding Quality
Ensuring the quality of your siding installation is crucial for maximizing its lifespan and protecting your home’s exterior. By diligently monitoring material quality and workmanship throughout the process, you can avoid costly repairs and ensure a beautiful, long-lasting result. This section details methods for maintaining quality and provides a checklist for inspecting the finished work.
Proper material selection and careful installation techniques are paramount to achieving high-quality siding. Neglecting these aspects can lead to issues ranging from minor cosmetic flaws to significant structural damage, potentially affecting your home’s energy efficiency and overall value. Prevention is always better than cure, and proactive measures during the installation process will yield significant long-term benefits.
Material Quality Control
Maintaining the quality of siding materials begins with careful selection. Inspect each piece for defects before installation. Look for warping, cracks, discoloration, or damage. Ensure that the materials meet the manufacturer’s specifications and are appropriate for your climate. For example, using vinyl siding in a region with extreme temperature fluctuations might lead to premature warping or cracking. Similarly, using wood siding without proper treatment in a humid climate can invite rot and insect infestation. Always verify that the materials are from a reputable supplier and that you have sufficient quantities to avoid delays and potential inconsistencies in color or texture.
Workmanship Inspection During Installation
Regular inspection during the installation process is vital to catch and rectify any issues early on. Observe the installers’ techniques. Ensure they are using appropriate fasteners, following manufacturer’s instructions, and maintaining consistent spacing and alignment. Poor flashing around windows and doors can lead to water damage, while improper nailing can cause siding to loosen or warp over time. Addressing these issues as they arise prevents larger, more expensive problems down the line. For example, consistently misaligned siding panels might require removal and reinstallation of several sections, while a small overlooked gap in flashing could result in extensive water damage and mold growth later.
Potential Quality Issues and Prevention
Several potential quality issues can arise during siding installation. Water intrusion is a major concern, often caused by improper flashing, gaps around windows and doors, or damaged siding panels. Prevention involves meticulous attention to detail during installation, ensuring proper sealing and flashing around all openings. Another common issue is fastener failure, typically due to improper nailing or the use of inappropriate fasteners. Using the correct fasteners and following the manufacturer’s recommendations for nail placement and spacing prevents this problem. Finally, poor alignment and inconsistent spacing of siding panels can detract from the overall aesthetic appeal and may even compromise the structural integrity of the installation. Maintaining consistent spacing and alignment throughout the installation process is key to avoiding this.
Completed Siding Installation Inspection Checklist
Before final payment, conduct a thorough inspection using the following checklist:
- Inspect all siding panels for cracks, gaps, or damage.
- Check for consistent spacing and alignment of panels.
- Verify proper flashing and sealing around windows, doors, and other openings.
- Examine all fasteners to ensure they are properly installed and secure.
- Look for any signs of water damage or moisture intrusion.
- Check the caulking around trim and accessories for gaps or cracks.
- Assess the overall appearance for any imperfections or inconsistencies.
This checklist ensures a comprehensive review of the completed installation, allowing you to identify and address any defects before they become major problems. Addressing these issues promptly minimizes future costs and ensures the longevity of your siding.
Illustrative Examples of Cost-Saving Measures
Saving money on siding installation doesn’t necessitate compromising on quality. Strategic planning and informed material choices can significantly reduce costs while maintaining a beautiful and durable exterior. The following examples illustrate how effective cost-saving measures can be implemented without sacrificing the longevity and aesthetic appeal of your siding.
Significant Cost Reduction Through Material Selection
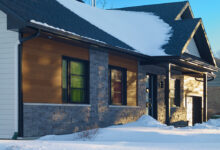
Choosing a less expensive siding material, such as high-quality vinyl instead of cedar or fiber cement, can dramatically reduce overall costs. For instance, a homeowner renovating a 1500 square foot house might find that cedar siding costs approximately three times as much as comparable vinyl siding. While cedar offers a natural look, high-quality vinyl siding, with its robust construction and advanced color technology, provides a nearly indistinguishable aesthetic appeal at a significantly lower price point. This homeowner, opting for a durable, deeply textured vinyl siding in a warm, earthy tone, achieved substantial savings while maintaining a visually appealing and long-lasting exterior. The difference in material cost alone could easily amount to thousands of dollars, allowing for reinvestment in other home improvement projects or simply freeing up more financial resources.
Effective Project Planning and Reduced Labor Costs
Meticulous project planning directly impacts labor costs. Consider a scenario where a homeowner meticulously plans their siding project. This involved creating detailed blueprints, securing all necessary permits well in advance, and precisely measuring the area needing siding. This detailed preparation allowed for efficient material ordering, minimizing waste and reducing installation time. The contractor, having clear instructions and a well-organized project, completed the installation swiftly and effectively. The reduction in labor hours directly translated to significant cost savings, potentially amounting to hundreds, even thousands of dollars depending on the size of the project and the contractor’s hourly rate. The organized approach ensured the project stayed on schedule, avoiding potential delays that often inflate labor costs.
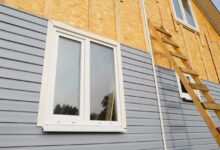
High-Quality vs. Lower-Quality Vinyl Siding
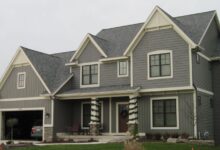
High-quality vinyl siding exhibits superior durability and aesthetic appeal compared to lower-quality options. High-quality vinyl siding typically features thicker panels, a more realistic wood-grain texture, and a UV-resistant formulation that prevents fading and cracking. The color is deeper and more consistent, and the panels themselves are more rigid, resisting warping and damage from impacts. In contrast, lower-quality vinyl siding may appear thin and flimsy, with a less defined texture and a tendency to fade or crack prematurely. The color may appear washed out or uneven, and the panels may warp or dent easily. A close examination reveals the difference in panel thickness and the quality of the surface texture. High-quality vinyl often has a more substantial feel and a more realistic imitation of wood grain, while lower-quality options feel thin and plasticky, with a less convincing texture. The subtle differences in detail, such as the depth of the wood grain embossing and the richness of the color, become apparent upon closer inspection, highlighting the value of investing in higher-quality materials for a more durable and aesthetically pleasing result.
Concluding Remarks
Ultimately, saving money on siding installation doesn’t have to mean sacrificing quality. By carefully planning your project, selecting appropriate materials, and employing efficient strategies, you can achieve both cost-effectiveness and a stunning, long-lasting exterior. Remember, thorough research, diligent planning, and informed decision-making are key to a successful and budget-friendly siding installation. This guide has equipped you with the knowledge to confidently navigate the process, ensuring your home receives the beautiful and durable siding it deserves without breaking the bank.