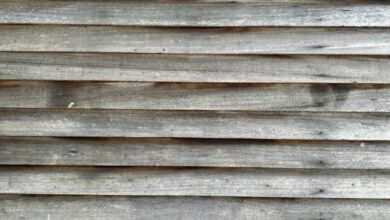
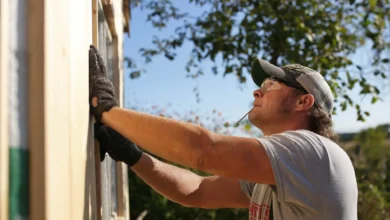
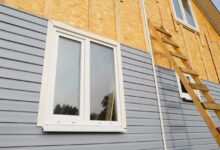
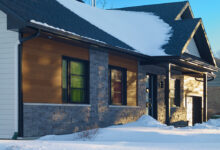
DIY Siding Projects: Budget Home Transformation
DIY Siding Projects: Transform Your Home on a Budget offers a compelling exploration of cost-effective home improvement. This guide delves into the practical aspects of planning, executing, and completing various siding projects, empowering homeowners to enhance their property’s aesthetic appeal without breaking the bank. We’ll cover everything from selecting appropriate materials and tools to mastering essential techniques and troubleshooting common challenges, ensuring a successful and rewarding DIY experience.
From simple repairs to complete exterior makeovers, this comprehensive guide provides step-by-step instructions, budget breakdowns, and safety guidelines to help you navigate each stage of your project confidently. Whether you’re a seasoned DIY enthusiast or a beginner, you’ll find valuable insights and practical advice to transform your home’s exterior with pride and affordability.


Introduction
DIY seating projects encompass the creation of chairs, benches, stools, and other seating arrangements using readily available materials and simple tools. Their appeal lies in the ability to personalize furniture to suit individual tastes and spaces, while simultaneously offering a cost-effective and environmentally conscious alternative to store-bought options. This approach allows for unique designs and the utilization of recycled or repurposed materials, fostering creativity and reducing waste.
DIY seating projects offer significant advantages over purchasing ready-made furniture. By crafting your own seating, you can drastically reduce expenses, potentially saving hundreds or even thousands of dollars depending on the complexity and materials used. For instance, building a simple pallet bench requires minimal investment in materials, while constructing a more elaborate chair from reclaimed wood might still cost significantly less than a comparable piece from a furniture store. Furthermore, choosing sustainable materials and repurposing old items contributes to environmental protection by minimizing the demand for newly manufactured products and reducing landfill waste. This aligns with growing concerns about sustainable living and responsible consumption.
Types of DIY Seating Projects
A wide variety of seating can be created through DIY methods. These range from simple projects, ideal for beginners, to more complex designs requiring advanced woodworking skills. Simple projects might include repurposing old pallets into benches or creating a basic stool from scrap wood. More involved projects could include building a comfortable armchair using reclaimed lumber or crafting a stylish outdoor loveseat from recycled materials. The possibilities are limited only by one’s imagination and skill level. For example, a rustic bench made from reclaimed railway sleepers offers a robust and visually appealing option, while a repurposed tire ottoman provides a unique and budget-friendly solution. The selection of project depends largely on the available resources, desired aesthetic, and the maker’s experience level.
Cost-Effectiveness and Environmental Impact
The cost-effectiveness of DIY seating is undeniable. The primary expense typically involves the cost of materials, which can be significantly lower than the price of comparable store-bought furniture, especially when using reclaimed or repurposed materials. For example, a simple pallet bench might cost only the price of screws and paint, while a more elaborate project using reclaimed wood might still be significantly cheaper than a new chair from a furniture retailer. Moreover, the environmental benefits are substantial. Using reclaimed wood, recycled pallets, or other reused materials reduces the demand for newly manufactured products, minimizing deforestation and carbon emissions associated with production and transportation. This contributes to a smaller carbon footprint and promotes sustainable living practices. Choosing eco-friendly paints and finishes further enhances the environmental impact.
Planning Your DIY Seating Project
Transforming your home with DIY seating projects can be a rewarding and cost-effective endeavor. Careful planning is crucial for a successful outcome, ensuring you stay within budget and achieve your desired aesthetic. This section outlines the key steps to effectively plan your project.
Thorough planning minimizes potential issues and maximizes your chances of creating a beautiful and functional piece of seating. By carefully considering design, materials, and budget beforehand, you can avoid costly mistakes and enjoy a smoother DIY process.
A Simple Checklist for Planning a DIY Seating Project
A comprehensive checklist helps streamline the planning process. This ensures you address all essential aspects before starting construction. The following points are vital for a successful project.
- Define your desired style and functionality: Will your seating be a modern minimalist bench, a rustic armchair, or something else entirely? Consider the intended use and the overall style of your room.
- Choose your materials: Select materials based on your budget, desired aesthetic, and durability requirements. Consider wood types, fabrics, foam density, and hardware.
- Create a detailed design sketch: Even a simple sketch helps visualize the final product and clarifies dimensions. Include detailed measurements of all components.
- Source materials and tools: Identify where you will purchase your materials and ensure you have all necessary tools before starting the project.
- Develop a realistic timeline: Allocate sufficient time for each stage of the project, allowing for unexpected delays.
- Establish a budget: Create a detailed budget breakdown to track expenses and prevent overspending.
Measuring and Preparing the Workspace
Accurate measurements and a well-organized workspace are fundamental for a successful DIY project. This ensures efficiency and reduces the likelihood of errors.
- Measure twice, cut once: Precise measurements are critical, especially for cutting wood or fabric. Double-check all measurements before making any cuts.
- Prepare your workspace: Choose a clean, well-lit area with ample space for all materials and tools. Clear the area of any obstructions.
- Organize your materials: Keep materials neatly organized to avoid confusion and wasted time during construction. Group similar items together.
- Ensure proper ventilation: If using paints, stains, or adhesives, ensure adequate ventilation to prevent health hazards.
- Utilize safety equipment: Wear appropriate safety glasses, gloves, and dust masks when necessary.
Sample Budget Breakdown for a Basic DIY Seating Project
A realistic budget is essential to avoid cost overruns. This example illustrates a basic breakdown for a simple bench project. Remember that costs can vary based on material choices and location.
| Item | Quantity | Cost per Unit | Total Cost |
|---|---|---|---|
| Wood (pine) | 8 linear feet | $5/linear foot | $40 |
| Screws | 1 box | $8 | $8 |
| Sandpaper | 1 sheet | $3 | $3 |
| Wood stain | 1 can | $15 | $15 |
| Foam padding (optional) | 1 sheet | $20 | $20 |
| Fabric (optional) | 2 yards | $10/yard | $20 |
| Total Estimated Cost | $106 |
This is a simplified example. The actual cost will depend on the specific materials and dimensions of your project. Remember to factor in any additional tools or supplies you may need.
Choosing Materials and Tools
Selecting the right materials and tools is crucial for a successful and enjoyable DIY seating project. The choices you make will significantly impact the final look, durability, and overall cost of your creation. Careful consideration of both material properties and the tools needed for their manipulation will streamline the process and help you achieve the desired outcome.
Different materials offer unique advantages and disadvantages. The best choice depends on your design, budget, and skill level. Factors such as weight, ease of assembly, maintenance requirements, and aesthetic appeal should all be considered. Similarly, selecting the appropriate tools ensures safety, efficiency, and a high-quality finish.
Material Comparison: Wood, Pallets, and Fabric
This section compares and contrasts the properties of wood, pallets, and fabric, three popular choices for DIY seating projects. Each material presents unique challenges and opportunities in terms of cost, durability, and aesthetic versatility.
| Material | Cost | Durability | Aesthetic Versatility |
|---|---|---|---|
| Wood (e.g., Pine, Oak) | Medium to High (depending on type and quality) | High (with proper treatment and construction) | High (can be stained, painted, or left natural) |
| Reclaimed Pallets | Low | Medium (varies greatly depending on pallet condition) | Medium (rustic aesthetic; requires cleaning and potential repair) |
| Fabric (e.g., Canvas, Upholstery) | Low to Medium (depending on fabric type and quantity) | Medium (depends on fabric quality and construction) | High (wide range of colors, patterns, and textures available) |
Essential Tools for DIY Seating Projects
The specific tools required will vary depending on the chosen materials and design complexity. However, a basic toolkit will generally include items for cutting, fastening, and finishing. Investing in quality tools ensures safety and a more professional outcome.
For wood projects, you’ll likely need a saw (circular saw or hand saw), drill, screwdriver (or drill with screwdriver bits), sandpaper, clamps, measuring tape, and possibly a wood planer or chisel depending on the project. Working with pallets may require additional tools for disassembly and cleaning, such as a hammer and pry bar. Fabric projects will require sewing tools like a sewing machine (or needles and thread), scissors, and possibly a staple gun for upholstery.
Popular DIY Seating Project Ideas
Transforming your home with DIY seating projects not only saves money but also allows for personalized design and functionality. This section explores several popular and achievable projects, providing detailed instructions to guide you through the process. Remember to prioritize safety and always follow appropriate safety precautions when using tools and materials.
Building a Simple Pallet Chair
Constructing a chair from reclaimed pallets offers a rustic and environmentally friendly seating solution. This project requires basic woodworking skills and readily available materials.
- Prepare the Pallets: Disassemble the pallets carefully, removing any loose nails or splinters. Sand the wood planks to smooth any rough edges and ensure a safe surface. Inspect the wood for any signs of damage or rot, discarding any unusable pieces.
- Cut and Shape the Wood: Using a saw (hand saw or circular saw), cut the pallet wood into pieces appropriate for the chair’s design. A simple design might involve creating a seat, backrest, and two legs from the pallet planks. Measurements will depend on your desired chair dimensions.
- Assemble the Frame: Use wood glue and screws to assemble the chair frame. Start by connecting the legs to the seat, ensuring stability and proper alignment. Attach the backrest to the seat, securing it firmly with screws.
- Finishing Touches: Once the frame is assembled, sand down any rough edges or protruding screws. Apply a wood stain or paint to protect the wood and add a desired aesthetic finish. Consider adding a comfortable cushion to the seat for added comfort.
Creating a Floor Cushion Using Repurposed Materials
Floor cushions offer versatile and comfortable seating, perfect for relaxation or casual gatherings. Repurposing old clothes or fabric scraps allows for creative designs and sustainable crafting.
- Gather Materials: Collect old clothes, towels, or fabric scraps in desired colors and patterns. You’ll also need strong thread, a sewing machine (or needle and thread for hand-sewing), and filling material such as cotton stuffing, foam scraps, or even old clothes cut into small pieces.
- Cut and Sew the Fabric: Cut the fabric into large squares or circles, depending on your desired cushion shape and size. Sew the pieces together, leaving an opening for stuffing. Consider using a double layer of fabric for added durability and comfort.
- Stuff the Cushion: Carefully fill the cushion with your chosen filling material, ensuring it’s evenly distributed. The amount of filling will determine the cushion’s firmness.
- Close the Opening: Once the cushion is adequately filled, sew the opening closed, creating a neat and secure finish. You can add decorative stitching or embellishments to enhance the cushion’s appearance.
Constructing a Comfortable Beanbag Chair
Beanbag chairs provide relaxed and informal seating, adapting to the user’s body shape. This project requires durable fabric and a significant amount of filling material.
- Choose Your Fabric: Select a strong, durable fabric like canvas or heavy-duty cotton. The fabric should be able to withstand the weight of the beans and regular use. Consider using a water-resistant fabric for added protection.
- Cut and Sew the Fabric: Cut two identical large circles or squares of fabric, allowing for seam allowances. Sew the two pieces together, leaving an opening for filling. Reinforce the seams for added durability.
- Fill the Beanbag: Fill the beanbag with expanded polystyrene beads (commonly used in beanbag chairs). The amount of filling will determine the beanbag’s firmness. Ensure the filling is evenly distributed.
- Close the Opening: Once the beanbag is adequately filled, sew the opening closed, ensuring a secure closure. You can add a zipper for easier refilling or cleaning.
Making a Hanging Chair Using Rope and Fabric
Hanging chairs offer a unique and relaxing seating experience, ideal for indoor or outdoor use. This project requires strong rope and durable fabric.
- Gather Materials: You will need strong rope (such as nylon or polypropylene), durable fabric (canvas or outdoor fabric is recommended), and sturdy hardware for hanging (a ceiling hook or a strong tree branch). A sewing machine and appropriate tools are also necessary.
- Cut and Sew the Fabric: Cut the fabric into a desired shape and size for the chair seat. Sew the fabric pieces together, creating a sturdy and comfortable seat. Consider adding padding or a cushion for added comfort.
- Attach the Rope: Carefully attach the rope to the fabric seat, ensuring it’s evenly distributed and securely fastened. Use strong knots and potentially reinforcing stitching to prevent the rope from slipping.
- Hang the Chair: Attach the hanging hardware to the ceiling or tree branch, and then hang the chair, ensuring it is securely fastened and balanced.
Advanced Techniques and Customization
Taking your DIY seating projects to the next level involves mastering advanced techniques and incorporating personalized touches. This section explores upholstering, decorative element integration, and style customization to help you create truly unique and functional pieces. These techniques will allow you to transform basic frames into stunning focal points for your home.
Upholstering Techniques for DIY Seating
Upholstering is a crucial skill for elevating the look and comfort of your DIY seating. It involves covering the frame with fabric, adding padding and securing it neatly. Successful upholstery requires careful measurement, precise cutting, and the use of appropriate tools. Different upholstery techniques exist depending on the complexity of the project and the type of fabric used. For example, a simple chair might utilize a staple gun to secure the fabric to the frame, while a more complex sofa may require specialized tools and techniques, like using welting cord to create a professional finish. Careful attention to detail is key; loose fabric or uneven stapling will detract from the final product.
Adding Decorative Elements to DIY Seating
Adding decorative elements transforms a basic piece of seating into a statement piece. These elements can range from simple to elaborate, depending on your skill level and desired aesthetic. Consider adding nailhead trim for a classic look, or incorporate contrasting fabrics for a more modern feel. Braiding or fringe can add texture and visual interest. For a more rustic aesthetic, consider using repurposed materials like leather straps or woven textiles. The possibilities are vast, limited only by your creativity and the resources available. For instance, adding decorative buttons to the backrest can enhance the visual appeal and provide a more structured look, while using patterned fabrics can introduce bold colors and designs into your living space.
Customizing DIY Seating to Match Different Home Styles
Adapting your DIY seating to complement your home’s style is paramount. Consider the overall design aesthetic of your home when selecting fabrics, colors, and decorative elements. A minimalist modern home would benefit from clean lines, neutral colors, and simple upholstery. A more traditional home might suit richly colored fabrics, ornate details, and perhaps even antique-inspired hardware. A farmhouse style could incorporate natural materials like linen or burlap, paired with simple, sturdy construction. By carefully considering the existing style of your home, you can ensure your DIY seating project seamlessly integrates into the overall design.
Safety and Best Practices
DIY seating projects, while rewarding, require careful attention to safety to prevent injuries and ensure a structurally sound final product. This section details essential safety precautions and best practices for a successful and safe project. Remember, safety should always be your top priority.
Proper tool handling and material management are crucial aspects of any DIY project. Failing to observe basic safety rules can lead to serious accidents, from minor cuts to more severe injuries. Therefore, a thorough understanding of safe working practices is essential before commencing any project.
Power Tool Safety
Safe operation of power tools is paramount. Always wear appropriate safety glasses or a face shield to protect your eyes from flying debris. Hearing protection is also recommended, especially when using loud tools like circular saws or routers. Before operating any power tool, ensure you understand its operation and safety features. Read the manufacturer’s instructions carefully. Maintain a firm grip on the tool and ensure it’s properly secured before starting. Never force the tool; let it do the work. Regularly inspect power cords for damage and replace them immediately if necessary. Disconnect the power tool from the power source before making any adjustments or cleaning. Finally, keep your work area clean and free of clutter to prevent accidents.
Sharp Object Handling
When working with sharp objects like chisels, knives, or utility blades, exercise extreme caution. Always cut away from yourself and use a cutting mat or stable work surface to prevent slippage. Store sharp tools securely in a designated area when not in use, out of reach of children. If you need to pass a sharp tool to someone, hand it over carefully, ensuring the blade is facing away from them. Regularly sharpen your tools; dull tools require more force, increasing the risk of accidents.
Structural Integrity
The structural integrity of your DIY seating project is crucial for its safety and longevity. Use high-quality materials appropriate for the intended load and purpose. Follow the plans carefully, ensuring all joints are secure and properly fastened. Use appropriate adhesives and fasteners, such as wood glue and screws, to create strong and durable joints. If you are unsure about the structural integrity of your design, consult a professional carpenter or engineer. Regularly inspect your finished project for any signs of wear or damage and address them promptly. Overloading the seating can compromise its structural integrity; ensure it is only used for its intended purpose and within its weight capacity. For example, a small stool might not be suitable for an adult to sit on for prolonged periods.
Troubleshooting and Problem Solving
DIY seating projects, while rewarding, can present unexpected challenges. Understanding common problems and their solutions can significantly improve the project’s outcome and reduce frustration. This section outlines potential issues and provides practical solutions to help you navigate these hurdles successfully.
Many difficulties arise from material imperfections, assembly errors, or unforeseen damage. Careful planning and execution minimize these risks, but knowing how to address problems when they occur is equally crucial. This guide will help you diagnose and resolve common issues, ensuring your DIY seating project is a success.
Material Imperfections
Material imperfections, such as cracks, splinters, or warping in wood, or inconsistencies in fabric texture, are common. Careful inspection of materials before starting the project is essential. However, if imperfections are discovered during construction, several solutions exist. For minor cracks in wood, wood filler can be used to repair the damage, followed by sanding and refinishing. Significant warping might necessitate replacing the affected piece. In the case of fabric imperfections, a careful assessment of the defect’s location and severity is needed. If the flaw is minor and doesn’t affect structural integrity or aesthetics, it might be acceptable to proceed. If the defect is major or in a prominent location, replacement of the fabric panel may be necessary.
Assembly Difficulties
Assembly problems often stem from inaccurate measurements, improper use of tools, or incorrect interpretation of instructions. For example, misaligned joints can lead to instability. Carefully review the plans and instructions before starting assembly. Double-check measurements and ensure all components fit together properly before securing them. If joints are misaligned, carefully disassemble the affected section, correct the alignment, and reassemble. Using clamps to hold pieces together while the adhesive dries can help prevent misalignment. If using screws, pre-drilling pilot holes can prevent wood splitting. For complex assemblies, seek assistance from experienced DIYers or refer to online tutorials for guidance.
Repairing Damaged DIY Seating
Damage to completed seating can occur due to accidents or wear and tear. For minor scratches on wooden seating, wood stain or furniture polish can effectively conceal the damage. For more significant damage, such as a broken leg, repairing the leg may be possible using wood glue and clamps. If the damage is beyond repair, consider replacing the affected part. For fabric tears, patching with a matching fabric or using fabric glue can be effective. If the fabric is significantly damaged, reupholstering might be necessary. Consider using protective measures like coasters and furniture covers to prevent future damage.
Showcasing Your Creations
Creating visually appealing photos of your finished DIY seating projects is crucial for sharing your hard work and inspiring others. High-quality images can significantly increase the impact of your project showcase, whether it’s for personal enjoyment or online sharing. Effective presentation transforms a simple project into a compelling narrative.
Proper photography and strategic online sharing are key to maximizing the visibility and appreciation of your DIY seating projects. A well-lit, well-composed photograph can dramatically improve the perceived quality of your work, attracting more attention and engagement. Social media platforms provide an excellent opportunity to connect with a wider audience of DIY enthusiasts and share your unique creations.
Visually Appealing Photography Techniques
To create professional-looking photos, consider these techniques. First, ensure ample natural light. Position your project near a window, avoiding harsh direct sunlight which can create unwanted shadows and washed-out colors. Use a neutral background to avoid distracting elements. A plain wall or a simple backdrop works well. Experiment with different angles to find the most flattering perspective. Consider using a tripod for sharper images, especially in low-light conditions. Finally, edit your photos using free or paid software to adjust brightness, contrast, and saturation for a polished look.
Showcasing Projects on Social Media
Social media platforms offer a vast audience for showcasing your DIY creations. Platforms like Instagram, Pinterest, and Facebook are particularly well-suited for visually-driven content. Use relevant hashtags to increase the discoverability of your posts. For example, #DIYseating, #handmadehome, #upcycledfurniture, or #homedecor. Engage with other users by commenting on their posts and responding to comments on your own. Consider creating a dedicated account or page for your DIY projects to build a cohesive online portfolio. Sharing behind-the-scenes glimpses of your process can also engage your audience and humanize your work.
Example Project: A Repurposed Pallet Bench
This project transforms a discarded pallet into a rustic bench. Materials included: one standard-sized wooden pallet (thoroughly cleaned and sanded), exterior-grade wood stain (dark walnut), exterior-grade sealant, two 4×4 inch wooden posts (cut to desired height for legs), wood screws, and a drill. Tools included: a hammer, a screwdriver, a drill with drill bits, sandpaper (various grits), safety glasses, and work gloves.
The process began with cleaning and sanding the pallet to remove splinters and debris. Next, the wood was stained with dark walnut, allowing sufficient drying time according to the manufacturer’s instructions. Once dry, a coat of sealant was applied to protect the wood from the elements. Two 4×4 inch wooden posts were then cut to the desired height for the bench legs, using a saw. These legs were attached to the pallet using wood screws and a drill, ensuring stability and even distribution of weight. The finished bench was left to cure completely before use, allowing the stain and sealant to fully set. The result was a sturdy, attractive bench perfect for a patio or garden, showcasing a blend of rustic charm and functional design. The project demonstrates the potential for upcycling and creating unique pieces for the home on a budget.
Ending Remarks
Ultimately, embarking on DIY siding projects allows homeowners to personalize their living spaces, increase their property value, and enjoy a sense of accomplishment. By following the guidelines and techniques outlined in this guide, you can confidently tackle your siding project, achieving stunning results while staying within your budget. Remember to prioritize safety and take your time; the satisfaction of a job well done is a reward in itself. Embrace the challenge, and transform your home into a reflection of your personal style and vision.