Common Siding Mistakes to Avoid During Installation
Common Siding Mistakes to Avoid During Installation: A seemingly straightforward home improvement project, siding installation can quickly become a costly headache if common mistakes aren’t avoided. From improper planning and measurement to neglecting crucial details like flashing and ventilation, the potential pitfalls are numerous. This guide will equip you with the knowledge to navigate these challenges, ensuring a successful and long-lasting siding installation.
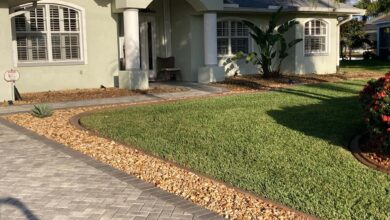
Proper siding installation is critical for protecting your home from the elements and maintaining its curb appeal. Understanding the common mistakes, such as inadequate wall preparation, incorrect nailing techniques, or ignoring building codes, can save you time, money, and significant future headaches. By following best practices and paying attention to detail, you can achieve a professional-looking and durable result that enhances your home’s value and beauty.


Improper Planning and Measurement
Careful planning and accurate measurements are foundational to a successful siding installation. Neglecting this crucial step can lead to significant problems, including material waste, installation delays, and an unprofessional-looking final product. Accurate measurements ensure a seamless fit and prevent costly mistakes down the line.
Accurate measurements are paramount in siding installation. Inaccurate measurements can result in several issues, including insufficient materials leading to project delays and additional costs associated with procuring more materials. Conversely, overestimating can result in significant material waste, increasing the overall project expense. Improper measurements can also lead to gaps, overlaps, or misalignments in the siding, compromising the aesthetic appeal and the structural integrity of the building envelope. These imperfections can also compromise weather resistance, leading to potential water damage and costly repairs.
Accurate Siding Measurement and Planning
Accurate siding measurement and planning involve a systematic approach that ensures sufficient material while minimizing waste. This process begins with a detailed assessment of the exterior walls, followed by precise measurements and careful calculations to determine the exact quantity of siding needed. This meticulous process ensures that the project proceeds smoothly and efficiently, leading to a professional-looking and long-lasting result.
- Detailed Site Assessment: Begin by thoroughly inspecting the exterior walls, noting any irregularities, such as windows, doors, corners, and variations in wall height. Sketch a diagram of the house, marking these features and their dimensions.
- Precise Measurements: Use a measuring tape to accurately measure the height and width of each wall section. Remember to account for any offsets or irregularities. Record all measurements meticulously on your diagram.
- Material Calculation: Calculate the total square footage of siding needed by multiplying the height and width of each wall section. Add these areas together to obtain the total square footage. Remember to add extra material (typically 5-10%) to account for cuts, waste, and unforeseen circumstances.
- Siding Selection: Choose the type and size of siding that best suits your needs and aesthetic preferences. Consider factors such as material durability, weather resistance, and maintenance requirements. The chosen siding dimensions will influence the final material quantity calculations.
- Order Confirmation: Once you have calculated the total material needed, verify your calculations and order the siding from a reputable supplier. Allow for sufficient lead time for delivery.
Common Measurement Tools and Applications
The selection of appropriate measurement tools is crucial for accurate siding installation. Using the correct tools ensures precise measurements, which are essential for a successful outcome.
| Measurement Tool | Application |
|---|---|
| Measuring Tape | Measuring lengths, widths, and heights of walls and other features. |
| Level | Ensuring that the siding is installed horizontally and vertically. |
| Square | Creating accurate 90-degree angles for corners and other features. |
| Chalk Line | Marking straight lines for consistent siding alignment. |
| Laser Level | Precisely establishing horizontal and vertical reference lines, especially useful on larger projects. |
Failing to Prepare the Wall Surface
A properly prepared wall is the foundation for a successful siding installation. Neglecting this crucial step can lead to a range of problems, from unsightly imperfections to premature siding failure. Taking the time to ensure your wall is clean, dry, and structurally sound will save you time, money, and frustration in the long run. This section will detail the importance of wall preparation and provide guidance on addressing common wall imperfections.
Proper wall preparation ensures a strong bond between the siding and the wall, preventing issues such as water damage, warping, and early deterioration of the siding. An unprepared wall can lead to gaps and inconsistencies in the finished product, compromising the aesthetic appeal and the protective function of the siding. Furthermore, failing to address underlying problems like cracks or moisture can exacerbate existing issues and lead to costly repairs down the line.
Addressing Wall Imperfections
Cracks, holes, and uneven surfaces are common wall imperfections that must be addressed before siding installation. Cracks should be repaired using appropriate patching compounds, ensuring complete filling and proper curing time before proceeding. Holes should be filled and sealed, paying close attention to the edges to prevent moisture penetration. Uneven surfaces can be addressed with skim coating or other leveling techniques, creating a smooth, consistent base for the siding. Failing to address these imperfections will result in an uneven siding installation, potentially leading to gaps and reduced durability.
Consequences of Inadequate Wall Preparation
Installing siding on an unprepared wall can have several negative consequences. Moisture can seep behind the siding, leading to mold growth, rot, and structural damage. Uneven surfaces can cause the siding to warp or buckle, resulting in an unattractive and unstable installation. Furthermore, poorly prepared walls can create gaps, allowing insects and pests to enter your home. These problems can significantly reduce the lifespan of your siding and lead to costly repairs or even complete replacement.
Necessary Wall Preparation Steps
Before beginning siding installation, it’s crucial to follow these steps to ensure proper wall preparation:
- Clean the wall surface thoroughly to remove dirt, dust, loose paint, and debris. A pressure washer can be effective for this purpose, but be cautious to avoid damaging the underlying structure.
- Allow the wall to dry completely. Moisture trapped behind the siding can lead to significant problems.
- Inspect the wall for cracks, holes, and other imperfections. Repair any damage using appropriate patching compounds or other methods.
- Ensure the wall surface is smooth and level. Use skim coating or other leveling techniques to address any unevenness.
- Prime the wall surface, especially if repairing significant damage or if the wall is made of a porous material. Primer provides a better surface for the siding to adhere to and helps prevent moisture penetration.
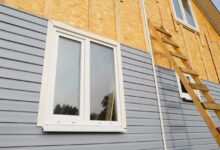
Incorrect Installation of Flashing and Sealants
Proper flashing and sealant application are critical for preventing water damage and ensuring the longevity of your siding installation. Neglecting these details can lead to costly repairs and significant structural issues down the line. Understanding the correct techniques for each siding type is crucial for a successful and watertight installation.
Flashing Installation: Preventing Water Intrusion
Flashing acts as a barrier, diverting water away from vulnerable areas of your home’s exterior. Its strategic placement prevents water from seeping behind the siding, into walls, and causing rot, mold, and other structural damage. Common flashing materials include aluminum, galvanized steel, and copper, each offering varying degrees of durability and corrosion resistance. Improper installation, however, can render even the most durable flashing ineffective.
Common Flashing Installation Mistakes and Their Consequences
Incorrect flashing installation frequently stems from a lack of understanding regarding its purpose and proper placement. For instance, failing to extend flashing sufficiently beyond the overlapping siding can leave gaps, allowing water penetration. Similarly, improper overlapping of flashing pieces, or failing to create a continuous, watertight seal at all seams and joints, can compromise its effectiveness. The consequences can range from minor water staining to extensive structural damage requiring costly repairs, including replacement of siding, sheathing, and even framing. In extreme cases, severe water damage can lead to the growth of mold and mildew, posing health risks to the occupants.
Proper Flashing Installation Techniques for Different Siding Types
The specific techniques for flashing installation vary depending on the type of siding used. For instance, vinyl siding typically requires flashing around windows, doors, and other penetrations, as well as at the bottom of the siding to prevent water from entering at the base. This often involves using J-channel and L-channel flashing, carefully ensuring that the flashing overlaps the underlying layer and extends beyond the siding to direct water away from the wall. Wood siding installations may require more extensive flashing, possibly incorporating flashing behind each course of siding, especially in areas prone to heavy rainfall or snow accumulation. The flashing should always be installed under the siding, ensuring water runs over the top and not behind the siding. For metal siding, proper sealing and overlapping of panels and flashing is paramount to prevent water from penetrating at the seams. In all cases, meticulous attention to detail is critical to ensure a watertight seal.
Sealant Application: Ensuring a Watertight Seal
Sealants provide an additional layer of protection, filling gaps and creating a watertight seal around windows, doors, and other penetrations where flashing alone may not be sufficient. Selecting the right type of sealant is important; choosing a sealant with appropriate flexibility and adhesion properties is crucial to ensure it remains effective over time. The sealant must be compatible with the siding material and the substrate to which it is applied. Moreover, the application process itself is crucial; a poorly applied sealant can crack or peel, rendering it ineffective.
Correct Sealant Application Techniques
Proper sealant application requires careful preparation. The surfaces must be clean, dry, and free of dust or debris to ensure proper adhesion. The sealant should be applied in a continuous, smooth bead, avoiding gaps or thin areas that can compromise the seal. Too much sealant can be equally problematic, leading to cracking as it cures. It is crucial to follow the manufacturer’s instructions regarding application and curing time. The sealant should be smoothed out using a suitable tool, such as a smoothing tool or finger (with a gloved hand). Allowing sufficient curing time before exposing the sealant to moisture is essential for optimal performance. Using the correct sealant for the specific application and climate is essential. For example, a sealant designed for extreme temperatures may be necessary in colder climates.
Neglecting Proper Ventilation
Adequate ventilation behind your siding is crucial for the long-term health and durability of your home’s exterior. Insufficient ventilation can lead to a range of problems, significantly impacting the lifespan of your siding and potentially causing costly repairs down the line. Understanding the importance of proper ventilation and implementing effective strategies during installation is key to preventing these issues.
Proper ventilation behind siding allows for the dissipation of moisture. Moisture can accumulate from various sources, including rain penetration, snow melt, and even humidity within the wall cavity. Without adequate ventilation, this moisture becomes trapped, creating a breeding ground for mold, mildew, and rot. This can weaken the structural integrity of your walls, damage the siding itself, and even lead to the growth of harmful allergens within your home. Furthermore, trapped moisture can cause the wood framing to swell and warp, potentially leading to expensive repairs or even complete siding replacement.
Methods for Ensuring Proper Ventilation
Several methods can be employed to ensure adequate ventilation during siding installation. These methods focus on creating pathways for air circulation behind the siding, allowing moisture to escape and preventing its accumulation. Choosing the right method depends on factors such as the type of siding used, the climate, and the existing wall construction.
Consequences of Insufficient Ventilation
Insufficient ventilation leads to a cascade of negative consequences. The most immediate concern is the development of mold and mildew. These organisms thrive in damp, dark environments, and the space behind siding provides the perfect conditions. Mold growth can compromise the structural integrity of the walls and create a health hazard for occupants, potentially triggering respiratory problems and allergies. Furthermore, the trapped moisture will inevitably lead to rot in the wood framing and sheathing, necessitating costly repairs or even complete wall replacement. The resulting damage can significantly reduce the lifespan of your siding and the overall value of your property.
Comparison of Ventilation Methods
| Ventilation Method | Effectiveness | Description |
|---|---|---|
| Soffit Vents and Gable Vents | High | This classic approach utilizes vents at the soffit (under the eaves) to draw in fresh air, and vents at the gable ends to allow moist air to escape. This creates a natural convection current. |
| Continuous Ventilation Systems | Very High | These systems incorporate a continuous path for airflow from the soffit to the gable, often using perforated sheathing or specialized ventilation channels. This provides consistent and effective ventilation across the entire wall. |
| Raked Vents | Moderate | Raked vents, installed at the top of the wall beneath the siding, provide an additional pathway for moisture escape. They are often used in conjunction with soffit vents. |
| Louvered Siding | Low to Moderate (depending on design) | Some siding types, such as certain types of vinyl or composite siding, have built-in louvers that allow for limited air circulation. However, this method alone is often insufficient for adequate ventilation. |
Improper Nail Placement and Fastening
Proper nailing is crucial for the longevity and structural integrity of your siding installation. Incorrect nail placement can lead to a range of problems, from unsightly damage to compromised structural support, ultimately requiring costly repairs. Understanding the correct techniques ensures a beautiful and durable finish.
The correct nailing technique involves careful consideration of nail type, spacing, and penetration depth. Using the wrong type of nail, placing nails too close together or too far apart, or driving them too deep or too shallow, can all have negative consequences. For instance, nails driven too deep can cause the siding to buckle or crack, while nails driven too shallow can lead to loose siding and potential damage during high winds or extreme weather conditions.
Nail Type and Spacing
The type of nail used should be appropriate for the type of siding material. For example, galvanized nails are generally recommended for their resistance to rust and corrosion. The spacing between nails is also critical. Nails should be spaced evenly, following the manufacturer’s recommendations, typically allowing for expansion and contraction of the siding material with temperature fluctuations. Overly close spacing can restrict movement and cause damage, while overly wide spacing compromises the structural integrity.
Imagine two images: one shows siding with nails spaced evenly and consistently across the surface, approximately 6 inches apart, maintaining a neat and uniform appearance. The other depicts siding with nails haphazardly placed, some clustered together, others widely spaced, resulting in an uneven and unprofessional look. The first image demonstrates correct nailing practice, while the second illustrates the consequences of improper spacing.
Nail Penetration Depth
The depth to which the nail is driven is equally important. The nail head should be countersunk slightly below the surface of the siding, allowing for proper caulking or sealing to protect against water damage. However, it’s crucial not to drive the nail too deep, as this can damage the siding material itself, causing splitting or cracking. Driving the nail too shallowly, on the other hand, will leave the siding insecure and prone to damage.
Visualize two more images: one shows a close-up of siding with nails countersunk just below the surface, leaving a small, barely visible indentation. The other shows a similar close-up, but the nails are driven too deep, resulting in visible cracks radiating from the nail heads. The first image illustrates correct nail penetration, whereas the second image showcases the detrimental effects of driving nails too deep.
Consequences of Improper Nailing
The consequences of improper nailing can range from minor cosmetic flaws to significant structural problems. Loose siding can be easily damaged by wind or impact, leading to costly repairs or even complete siding replacement. Damaged siding can also compromise the building’s insulation and waterproofing, leading to increased energy costs and potential water damage. In severe cases, improperly nailed siding can even contribute to structural instability, posing a safety risk.
Consider a real-life example: a house with improperly installed siding experienced significant damage during a storm. The loose siding was ripped off, causing water damage to the underlying structure. The repair costs were substantially higher than they would have been if the siding had been properly installed initially. This case highlights the importance of proper nailing techniques and their impact on both the aesthetics and the structural integrity of a building.
Ignoring Building Codes and Regulations
Adhering to local building codes and regulations is paramount during siding installation. These codes are designed to ensure the safety, structural integrity, and longevity of your home, protecting both you and your investment. Ignoring these regulations can lead to serious consequences, impacting not only the aesthetic appeal of your siding but also the structural soundness and even the habitability of your home.
Failing to comply with building codes can result in a range of negative outcomes. These may include structural damage to your home, leading to costly repairs or even complete reconstruction. Furthermore, non-compliance can invalidate your homeowner’s insurance, leaving you financially vulnerable in the event of damage. In some jurisdictions, you might face fines or legal action from building inspectors, potentially leading to the costly removal and reinstallation of the siding. Ultimately, neglecting building codes jeopardizes the safety and value of your property.
Examples of Common Code Violations Related to Siding Installation
Building codes often specify requirements for things like the type of siding material allowed, the proper installation methods, and the necessary clearances around windows and doors. Violations frequently occur due to using inappropriate materials for the climate, neglecting proper fastening techniques, or failing to maintain sufficient ventilation behind the siding. For example, using vinyl siding in a high-wind area without adhering to specified fastening requirements could lead to damage during storms, and using non-code-compliant flashing around windows can cause water damage and mold growth. Another common violation is insufficient spacing between the siding and the house’s exterior wall, preventing adequate ventilation and potentially leading to moisture buildup and rot. Local building departments typically have detailed guides and resources available to homeowners to ensure compliance. Consulting these resources before starting any siding project is crucial for avoiding costly mistakes and ensuring the safety and longevity of your home.
Lack of Attention to Detail and Finishing
Meticulous attention to detail is paramount for a successful siding installation. Overlooking seemingly minor details during the process can lead to significant aesthetic flaws and, more importantly, compromise the long-term durability and weather resistance of the siding. A professional finish not only enhances the curb appeal of your home but also ensures the proper functioning of the siding system, protecting your investment from the elements.
Proper finishing techniques are crucial for preventing water intrusion, which is a leading cause of damage to homes. Careful attention to corners, edges, and trim pieces ensures a seamless, weathertight barrier. This section details best practices for achieving a high-quality finish that will stand the test of time.
Finishing Corners, Edges, and Trim
Correctly finishing corners, edges, and trim pieces is essential for creating a clean, professional look and preventing water penetration. Improperly installed trim can lead to gaps and cracks, allowing moisture to seep behind the siding and damage the underlying structure. Using the appropriate trim pieces designed for your specific siding type is crucial. These pieces are typically designed with overlapping features to ensure a tight seal. Caulk should be applied to all joints and seams to further enhance the watertight seal. For example, exterior corners should use corner trim specifically designed to fit snugly, ensuring a complete cover and a clean, finished look. Similarly, J-channel is used to finish edges and provide a neat transition between the siding and other building components. The application of high-quality, weatherproof caulk at all joints ensures a long-lasting, watertight seal.
Finishing Siding Around Windows and Doors
Properly finishing siding around windows and doors requires careful planning and execution. Failing to do so correctly can lead to leaks, drafts, and an unattractive appearance. This involves using appropriate flashing and trim to create a watertight seal and a clean transition between the siding and the window or door frames. A step-by-step approach is recommended:
- Install flashing: Before installing siding, install flashing around the window or door frame. This flashing should extend beyond the frame to prevent water from seeping behind the siding. The flashing should overlap appropriately, creating a waterproof barrier. Ensure proper sealing of all seams and joints using high-quality exterior-grade sealant.
- Install trim: Once the flashing is in place, install the appropriate trim pieces. This typically involves using J-channel or other specialized trim designed for windows and doors. The trim should be securely fastened and properly sealed to prevent water intrusion.
- Install siding: Install the siding panels around the window or door, ensuring they are properly butted against the trim. Avoid gaps or overlaps that could allow water penetration. Use appropriate fasteners and ensure proper spacing between panels.
- Caulk and Seal: Apply a bead of high-quality exterior-grade caulk to all joints and seams between the siding, trim, and window or door frame. This will create a watertight seal and prevent drafts.
- Inspect and Repair: After completion, carefully inspect the work for any gaps, cracks, or other imperfections. Repair any issues immediately to prevent future problems.
Following these steps ensures a professional and weather-resistant installation around windows and doors, significantly increasing the longevity and performance of the entire siding system. Paying close attention to detail in these areas is crucial for preventing future water damage and maintaining the aesthetic appeal of your home.
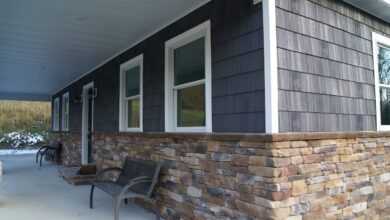
Choosing the Wrong Siding Material for the Climate
Selecting the appropriate siding material is crucial for the longevity and performance of your home’s exterior. The wrong choice can lead to costly repairs, reduced energy efficiency, and even structural damage. Climate conditions significantly influence siding material selection, impacting its durability, maintenance needs, and overall lifespan.
Choosing a siding material ill-suited to your local climate can have significant long-term implications. For example, a material prone to moisture damage in a humid climate will require frequent repairs and replacements, leading to increased costs over the building’s lifetime. Conversely, a material that lacks sufficient insulation in a cold climate will contribute to higher energy bills and potential interior damage from freezing and thawing cycles.
Siding Material Suitability for Various Climates
Different siding materials possess unique properties that make them more or less suitable for specific climates. Wood siding, for instance, is aesthetically pleasing but requires regular maintenance and is susceptible to rot and insect infestation in humid or wet climates. Vinyl siding, on the other hand, is relatively low-maintenance and resists moisture, making it a popular choice in many climates. However, it can become brittle and crack in extremely cold climates. Fiber cement siding offers a balance of durability, low maintenance, and resistance to various weather conditions, but it is heavier than vinyl and more expensive. Metal siding, such as aluminum or steel, is extremely durable and resistant to fire and insects, but it can be susceptible to dents and may experience expansion and contraction in extreme temperatures. Stone or brick siding offers exceptional durability and weather resistance but is significantly more expensive and labor-intensive to install.
Long-Term Implications of Inappropriate Siding Material Selection
The consequences of choosing the wrong siding can extend far beyond initial installation costs. In humid climates, selecting a material like wood without proper treatment and maintenance can lead to rapid deterioration, requiring frequent repairs or complete replacement within a few years. In areas with heavy snowfall, siding materials that lack sufficient insulation can result in increased heating costs and potential for ice dam formation. Materials that expand and contract significantly with temperature fluctuations, like some types of metal siding, can lead to cracking or buckling over time. Ignoring the specific climatic challenges of your region when selecting siding can translate into significantly higher maintenance costs and reduced lifespan for your home’s exterior.
Recommendations for Choosing the Right Siding Based on Climate Conditions
For hot and humid climates, consider low-maintenance options like vinyl or fiber cement siding, which resist moisture and decay. In cold climates, materials with good insulation properties, such as fiber cement or engineered wood, are recommended to minimize energy loss and prevent ice dam formation. Areas prone to high winds should utilize siding with strong resistance to impact and wind uplift. Coastal regions require materials resistant to salt spray and moisture, such as vinyl, fiber cement, or certain types of metal siding. Ultimately, the best choice depends on a careful assessment of your specific climate and the long-term needs of your home. Consulting with a qualified building professional is strongly recommended to ensure you make an informed decision tailored to your location and budget.
Final Conclusion
Successfully installing siding requires careful planning, meticulous execution, and attention to detail. By understanding and avoiding the common mistakes outlined in this guide, you can significantly improve the chances of a successful project. Remember that proper preparation, correct material selection, and adherence to building codes are crucial for a long-lasting, aesthetically pleasing, and weather-resistant exterior. Invest the time in planning and execution; your home will thank you for it.