Custom Cedar Shake Siding Panels: A Comprehensive Guide
Custom Cedar Shake Siding Panels offer a timeless and elegant exterior solution for homes. This guide delves into the intricacies of this beautiful and durable siding option, exploring everything from the manufacturing process and material properties to installation techniques, design considerations, and long-term maintenance. We’ll examine the various cedar species, their unique characteristics, and the impact of different finishes on longevity. Furthermore, we’ll provide a cost analysis and address common concerns regarding environmental impact and warranty information.
Whether you’re a homeowner considering a renovation or a contractor seeking detailed specifications, this comprehensive resource aims to equip you with the knowledge necessary to make informed decisions about incorporating custom cedar shake siding into your next project. We’ll cover the advantages and disadvantages, providing a balanced perspective on this increasingly popular choice for enhancing curb appeal and property value.


Manufacturing Process
Creating custom cedar shake siding panels is a multi-stage process requiring precision and expertise at each step, from careful log selection to the final protective finish. The process balances traditional craftsmanship with modern manufacturing techniques to ensure consistent quality and durability. The choice of manufacturing method and cedar species significantly impacts the final product’s appearance, longevity, and cost.
The journey begins with the selection of high-quality cedar logs. These logs are carefully assessed for straight grain, minimal knots, and overall structural integrity. Species selection, as discussed later, is crucial at this point. Once selected, the logs are debarked and processed into lumber using either traditional sawmills or more modern, automated systems. This lumber is then carefully graded and sorted based on quality and dimensions to optimize material use in subsequent stages.
Cedar Shake Panel Production Steps
The creation of cedar shake siding panels involves a series of precise steps. A detailed flowchart is presented below to visualize the entire production process.
Flowchart: Custom Cedar Shake Siding Panel Production
[Imagine a flowchart here. The flowchart would begin with “Log Selection & Grading,” branching to “Debarking & Sawing,” then to “Drying & Kiln Treatment,” followed by “Ripping & Shaping (shake creation),” then “Sorting & Grading (shakes),” followed by “Panel Assembly & Gluing,” then “Finishing (Sanding & Staining/Sealing),” and finally “Quality Control & Packaging.”]
Manufacturing Techniques Comparison
Several manufacturing techniques can be employed to produce cedar shake siding panels. The primary distinction lies in the level of automation and the degree of customization achievable.
Traditional Methods: These methods often involve hand-splitting and shaping of the cedar shakes, offering a more rustic and varied appearance. However, this process is labor-intensive and less efficient than automated methods. Consistency in size and shape can be challenging.
Automated Methods: Modern automated systems utilize specialized machinery to rip, shape, and even assemble the shakes into panels. This allows for greater precision, consistency, and higher production volumes. While this method can achieve a high degree of uniformity, it may lack the unique character of hand-crafted shakes.
Cedar Species Comparison
Different cedar species offer varying properties, influencing the final product’s durability, appearance, and cost. The selection of cedar species is a critical decision that impacts both the aesthetic and performance characteristics of the siding panels.
| Cedar Species | Advantages | Disadvantages | Cost (Relative) |
|---|---|---|---|
| Western Red Cedar | Naturally rot-resistant, durable, attractive grain patterns | Can be more expensive than other species, susceptible to insect damage if not properly treated | High |
| Eastern White Cedar | Lightweight, relatively inexpensive, good for smaller projects | Less durable than Western Red Cedar, prone to warping if not properly dried | Medium |
| Incense Cedar | Strong fragrance, good insect resistance, relatively affordable | Can be less durable than Western Red Cedar, color can vary significantly | Medium-Low |
| Alaska Yellow Cedar | Exceptional durability and rot resistance, beautiful golden color | High cost, limited availability | High |
Material Properties
Cedar shake siding offers a compelling blend of natural beauty and remarkable durability, making it a popular choice for homeowners seeking a long-lasting and aesthetically pleasing exterior. Its inherent properties, combined with appropriate finishing techniques, contribute significantly to its lifespan and overall performance.
The longevity of cedar shake siding is largely dependent on the quality of the wood itself and the chosen protective finish. High-quality cedar, properly graded and treated, can last for decades, even exceeding 50 years with minimal maintenance under ideal conditions. However, environmental factors and the application of finishes play a significant role in determining its actual lifespan.
Finish Impact on Lifespan
The application of a high-quality stain or sealant significantly extends the life of cedar shake siding. A well-maintained finish protects the wood from the damaging effects of UV radiation, moisture, and insect infestation. Oil-based stains penetrate the wood, providing deeper protection, while water-based stains offer easier application and lower VOCs. Sealants create a barrier against moisture, preventing rot and decay. Regular reapplication, typically every 3-5 years depending on the product and climate, is crucial for maintaining protection and extending the siding’s lifespan. Neglecting maintenance can lead to premature weathering, cracking, and the need for earlier replacement. For example, a home in a sunny, arid climate might require more frequent staining than one in a humid, shaded environment.
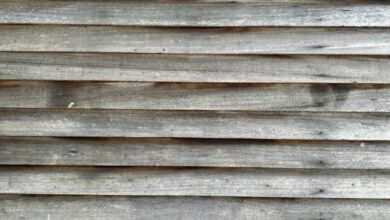
Texture and Appearance Variations
Cedar shake siding is celebrated for its natural variations in texture and appearance. Each shake possesses a unique character, with subtle differences in grain patterns, color tones, and surface texture. This inherent variability contributes to the siding’s rustic charm and natural beauty. The shakes may range from smooth to deeply textured, with knots and variations in color adding to the overall visual appeal. The color can vary from light reddish-brown to a deeper, almost brown hue, depending on the species of cedar, its age, and exposure to sunlight. These variations contribute to the unique character and aesthetic appeal of each installation, ensuring no two homes look exactly alike.
Cedar’s Weather Resistance
The inherent properties of cedar contribute significantly to its weather resistance. Properly installed and maintained cedar shake siding provides excellent protection against various weather conditions.
The following points highlight cedar’s natural defenses against the elements:
- Rain: Cedar’s natural oils and tight grain structure offer good resistance to water absorption, minimizing the risk of rot and decay. However, proper flashing and sealing are still essential to prevent water penetration at vulnerable points.
- Snow: Cedar’s relatively lightweight nature helps prevent damage from heavy snow loads. Proper installation and maintenance are crucial to ensure snow doesn’t accumulate and cause damage.
- Sun: Cedar’s natural resistance to UV radiation is moderate. However, exposure to prolonged sunlight can lead to fading and graying over time. The application of a UV-resistant stain or sealant significantly mitigates this effect and prolongs the life of the siding.
Installation Methods
Proper installation of custom cedar shake siding panels is crucial for ensuring the longevity and aesthetic appeal of your project. A well-installed system will provide years of protection and beauty, while improper installation can lead to premature deterioration and costly repairs. This section details best practices and techniques for a successful installation.
Installation Techniques: Nailing, Stapling, and Other Methods
Several methods exist for attaching cedar shake siding panels, each with its own advantages and disadvantages. Nailing remains a popular and reliable choice, offering excellent holding power and suitability for various panel thicknesses. However, pre-drilling pilot holes is often necessary to prevent splitting, especially with thicker shakes. Stapling, while faster, may not provide the same level of holding strength as nailing, particularly in areas exposed to high winds or significant stress. Therefore, nailing is generally preferred for exterior applications. Alternative fastening methods, such as using specialized clips or adhesives, are sometimes employed for specific situations or architectural styles, but require careful consideration and adherence to manufacturer’s instructions.
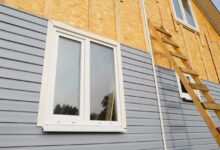
Cutting and Fitting Panels Around Windows and Doors
Precise cutting and fitting are essential for a professional-looking finish, particularly around openings like windows and doors. Accurate measurements are paramount. Using a sharp utility knife or circular saw with a fine-tooth blade ensures clean cuts. For intricate cuts, a jigsaw might be more suitable. Remember to always allow for expansion and contraction of the wood due to changes in temperature and humidity. Proper flashing and caulking are also critical to prevent water infiltration around these vulnerable areas. A common technique involves cutting the shakes slightly oversized, then carefully trimming them to achieve a precise fit after installation. This ensures a clean and watertight seal.
Step-by-Step Installation Guide
This guide outlines the process of installing cedar shake siding panels. Remember to always prioritize safety by wearing appropriate personal protective equipment (PPE), including safety glasses and gloves.
- Preparation: Ensure the underlying structure is properly prepared and inspected. This includes checking for straightness, plumbness, and proper sheathing. Any necessary repairs should be completed before starting the siding installation.
- Framing and Furring Strips: Install furring strips to create a consistent and level surface for the siding panels. This allows for proper ventilation and helps prevent moisture buildup.
- Panel Installation: Begin installing panels at a corner or a prominent feature, working your way across the wall. Maintain consistent spacing between panels according to manufacturer specifications. Pre-drill pilot holes and use galvanized nails for optimal fastening. Stagger the seams between courses to improve the overall appearance and structural integrity.
- Cutting and Fitting: Carefully measure and cut panels to fit around windows and doors, ensuring a tight and watertight seal. Use appropriate flashing and caulking to prevent water penetration.
- Finishing Touches: Once all panels are installed, inspect for any gaps or inconsistencies. Caulk any necessary areas to ensure a weathertight seal. Clean up any debris.
Necessary Tools and Safety Precautions
The tools required for cedar shake siding installation include a measuring tape, level, circular saw or utility knife, hammer, nails or staples, safety glasses, gloves, and a caulking gun. Always follow manufacturer’s instructions for specific panel types and fastening methods. Remember that working at heights requires appropriate safety precautions, such as using scaffolding or a ladder with appropriate safety measures. Always ensure the work area is clear of obstructions and that proper safety procedures are followed.
Design Considerations
The aesthetic appeal of a home is significantly enhanced by the careful consideration of its exterior design elements. Custom cedar shake siding panels offer a versatile material that can be adapted to a wide range of architectural styles, creating visually stunning and enduring facades. Understanding the interplay of panel size, shape, color, and finish is crucial in achieving the desired design outcome.
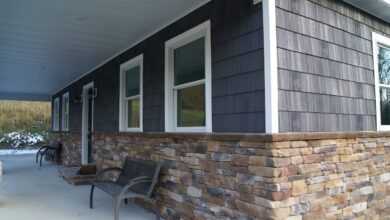
Design Styles and Cedar Shake Siding
Custom cedar shake siding lends itself beautifully to various architectural styles. For instance, a rustic, mountain-style home might utilize larger, roughly textured panels in a natural, weathered gray finish, emphasizing a sense of rugged charm. Conversely, a more contemporary home could feature smaller, uniformly sized panels in a clean, stained finish, creating a sleek and modern look. Traditional homes often benefit from the classic appeal of medium-sized panels in earthy tones, providing a timeless elegance. The versatility of cedar shake allows for seamless integration into various design aesthetics.
Impact of Panel Size and Shape
The size and shape of the cedar shake panels significantly influence the overall visual impact. Larger panels create a bolder, more dramatic statement, often associated with rustic or craftsman-style homes. They can also make a smaller house appear larger. Smaller panels, on the other hand, provide a more refined and detailed appearance, suitable for contemporary or traditional designs. The shape of the panels – whether rectangular, tapered, or irregularly shaped – further contributes to the aesthetic. Tapered shakes, for example, offer a more traditional, hand-hewn look, while rectangular panels provide a cleaner, more modern feel. The selection should align with the desired architectural style and the overall scale of the house.
Cedar Shake Color and Finish Options
Cedar shake siding offers a broad spectrum of color and finish options to suit diverse design preferences. Natural cedar, with its rich reddish-brown tones, provides a warm and inviting aesthetic. Various stains can enhance the natural beauty of the wood, offering a range of colors from light honey tones to deep, earthy browns and grays. Paints can also be applied to create a wider palette of colors, allowing for greater customization. Furthermore, different finishes, such as clear coats, semi-transparent stains, or solid-color paints, can influence the texture and longevity of the siding. A clear coat will emphasize the natural wood grain while a solid color paint will create a uniform, bold look.
House Facade Design Examples
Below are three distinct house facade designs utilizing custom cedar shake siding:
- Rustic Mountain Retreat: This design features large, irregularly shaped cedar shake panels in a natural, weathered gray finish. The panels are installed in a staggered pattern, adding visual texture and depth. The overall effect is one of rustic charm and natural elegance, complementing a mountainous landscape. Dark brown timber accents and stonework are used to further enhance the rustic feel.
- Contemporary Coastal Home: This design utilizes smaller, uniformly sized cedar shake panels in a clean, whitewashed finish. The panels are installed in a straight, horizontal pattern, creating a sleek and modern aesthetic. Large windows and a minimalist design emphasize the clean lines of the siding. The whitewashed finish complements the surrounding coastal environment.
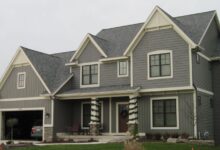
- Traditional Farmhouse: This design employs medium-sized, rectangular cedar shake panels in a warm, honey-toned stain. The panels are installed in a traditional, overlapping pattern. A gabled roofline and classic architectural details enhance the farmhouse charm. The warm stain complements the natural surroundings and creates a welcoming atmosphere.
Cost Analysis
The cost of custom cedar shake siding panels is a multifaceted issue influenced by several key variables. Understanding these factors allows for informed decision-making and accurate budgeting during a home renovation or new construction project. This analysis will detail the cost drivers, provide comparisons to alternative siding options, and explore the long-term financial benefits of choosing cedar shake.
Factors Influencing Cost
Several interconnected factors significantly impact the overall cost of custom cedar shake siding panels. These include the grade and quality of the cedar wood, the chosen finish (e.g., natural, stained, or treated), the complexity of the design, the labor costs associated with installation, and regional variations in material and labor prices. Higher-grade cedar, requiring less sorting and featuring fewer imperfections, commands a higher price. Similarly, intricate designs and specialized finishes increase the overall expense. Labor costs, which can vary widely depending on location and installer experience, represent a substantial portion of the total cost. Finally, regional differences in lumber availability and labor rates can significantly affect the final price.
Cost Comparison with Other Siding Materials
Cedar shake siding, while offering unparalleled aesthetic appeal and longevity, is typically more expensive than other common siding materials. Vinyl siding, for example, is generally the most affordable option, offering a low initial cost but often requiring more frequent replacement due to its susceptibility to damage and fading. Fiber cement siding presents a mid-range option, boasting greater durability than vinyl but still falling short of cedar shake’s lifespan and natural beauty. The following table provides a general cost comparison per square foot, acknowledging that actual prices can vary considerably depending on the factors discussed above.
Cost Per Square Foot Comparison
| Siding Material | Grade/Finish | Cost per Square Foot (USD) | Notes |
|---|---|---|---|
| Cedar Shake | Premium, Clear Grade, Natural Finish | $15 – $25 | High-quality cedar with minimal imperfections. |
| Cedar Shake | Standard Grade, Stained Finish | $10 – $18 | Common grade with some imperfections; stain adds cost. |
| Vinyl Siding | Standard | $3 – $8 | Low initial cost, but shorter lifespan. |
| Fiber Cement Siding | Standard | $8 – $15 | More durable than vinyl, but less aesthetically pleasing than cedar. |
Note: These price ranges are estimates and may vary based on location, supplier, and project specifics.
Long-Term Cost Savings
While the initial investment in cedar shake siding is higher, its exceptional durability and longevity translate to significant long-term cost savings. Cedar shake, with proper maintenance, can last for 50 years or more, significantly reducing or eliminating the need for costly replacements or repairs compared to vinyl or fiber cement siding, which may require replacement every 15-30 years. Furthermore, the inherent insulating properties of cedar wood can contribute to lower energy bills over the life of the siding. This reduced need for maintenance and replacement, coupled with potential energy savings, makes cedar shake a financially sound investment in the long run. For example, a homeowner replacing vinyl siding every 20 years will incur significantly higher costs over a 50-year period compared to a homeowner with cedar shake siding installed once.
Maintenance and Repair
Proper maintenance is crucial for extending the lifespan and preserving the aesthetic appeal of your cedar shake siding. Regular inspections and timely repairs prevent minor issues from escalating into costly replacements. Neglecting maintenance can lead to premature deterioration, compromising both the structural integrity and the visual charm of your home’s exterior.
Cedar Shake Siding Maintenance Tasks
A routine maintenance schedule helps prevent significant damage and keeps your siding looking its best. This involves both preventative measures and addressing any emerging problems. Regular cleaning and inspection are key components of a successful maintenance strategy.
- Annual Cleaning: Use a soft-bristled brush and a solution of mild detergent and water to gently remove dirt, debris, and cobwebs. Avoid high-pressure washing, which can damage the shakes. For stubborn stains, consider a specialized wood cleaner designed for exterior use. Always rinse thoroughly with clean water.
- Twice-Yearly Inspection: Conduct a thorough visual inspection of the siding twice a year, in spring and fall. Check for cracks, loose shakes, signs of rot or insect infestation, and any damage caused by weather events.
- Caulk Repair: Inspect and reapply caulk around windows, doors, and other areas where the siding meets other building materials. Cracked or missing caulk allows moisture penetration, leading to rot and damage.
- Stain and Sealant Application: Depending on the climate and the type of finish applied, re-staining or resealing may be necessary every 3-5 years. This protects the wood from the elements and maintains its color and appearance. Consult with a professional for recommendations based on your specific climate and siding type.
Identifying and Repairing Common Problems
Early detection and prompt repair of problems are essential for preventing further damage. Different issues require different approaches. Addressing problems quickly can save time and money in the long run.
Crack Repair
Small cracks can often be repaired with wood filler specifically designed for exterior use. Larger cracks may require replacing the damaged shake. Ensure the filler matches the color of the siding as closely as possible for a seamless repair. For significant cracks or extensive damage, replacing the affected shakes is the best solution.
Rot Repair
Rot is a serious issue that requires immediate attention. It often indicates moisture penetration. Severely rotted shakes must be removed and replaced. Addressing the underlying cause of the moisture problem, such as inadequate flashing or drainage issues, is critical to preventing further rot.
Insect Damage
Signs of insect damage, such as holes, sawdust, or insect activity, require prompt action. Treat affected areas with an insecticide approved for exterior wood use. Severe infestations may necessitate professional pest control intervention. In cases of extensive damage, replacement of affected shakes may be necessary.
Cedar Shake Siding Inspection Checklist
Before beginning any inspection, ensure you have the necessary safety equipment, including sturdy footwear and possibly a ladder for reaching higher areas.
- Overall Appearance: Check for any discoloration, warping, or signs of damage.
- Individual Shakes: Inspect each shake for cracks, splits, or loose pieces.
- Caulking: Examine caulk around windows, doors, and other openings for cracks or gaps.
- Flashing: Check the flashing around chimneys, vents, and other penetrations for proper sealing.
- Gutters and Downspouts: Ensure gutters and downspouts are clean and functioning correctly to prevent water damage.
- Insect Activity: Look for signs of insect infestation, such as holes, sawdust, or insect activity.
- Rot: Check for soft or spongy areas, which indicate rot.
Environmental Impact
Cedar shake siding, while a beautiful and durable building material, carries an environmental footprint that needs careful consideration. Understanding its sustainability involves examining its lifecycle, from sourcing to disposal, and comparing it to alternative siding options. This section explores the environmental aspects of using cedar shake siding, focusing on responsible sourcing, carbon footprint, and end-of-life management.
Cedar shake siding’s environmental impact is multifaceted. While it is a natural, renewable resource, the process of harvesting, manufacturing, and transporting it contributes to greenhouse gas emissions. Furthermore, the longevity of the material influences its overall environmental burden. A longer lifespan reduces the frequency of replacement, thus lowering the cumulative environmental impact compared to materials with shorter lifespans requiring more frequent replacements.
Carbon Footprint of Cedar Shake Siding
The carbon footprint of cedar shake siding is influenced by several factors, including the distance traveled from forest to processing plant to construction site, the energy used in manufacturing, and the type of harvesting and transportation methods employed. Generally, it’s considered to have a lower carbon footprint than some manufactured siding materials, such as vinyl or fiber cement, due to the carbon sequestration properties of the cedar tree during its growth. However, a high-energy manufacturing process or extensive transportation distances can significantly increase its overall carbon footprint. A comparison study conducted by the University of California, Berkeley, for example, indicated that cedar siding had approximately 30% lower embodied carbon compared to vinyl siding for a typical residential application, primarily due to the carbon sequestration in the growing cedar trees. This should be considered alongside the fact that the production of vinyl siding is heavily reliant on fossil fuels.
Responsible Sourcing and Harvesting Practices
Sustainable forestry practices are crucial to minimizing the environmental impact of cedar shake siding. Responsible cedar suppliers adhere to strict guidelines, ensuring that harvesting doesn’t exceed the rate of forest regeneration. These practices often include selective harvesting, where only mature trees are removed, leaving younger trees to continue growing. Furthermore, responsible suppliers prioritize reforestation efforts, planting new trees to replace those harvested. The Forest Stewardship Council (FSC) certification provides a reliable indicator of sustainable forestry practices. Looking for FSC-certified cedar ensures that the wood comes from responsibly managed forests. Certification processes often involve rigorous audits to verify sustainable practices across the supply chain, from harvesting to processing.
Recyclability and Biodegradability
At the end of its lifespan, cedar shake siding offers some environmental advantages. While not readily recyclable in the same way as some metals, cedar is biodegradable. Over time, it will decompose naturally, returning nutrients to the soil. However, the decomposition process can be slow, potentially spanning decades. Some homeowners choose to repurpose old cedar shakes for smaller projects like landscaping features or garden edging, extending the material’s useful life and delaying its decomposition. The ultimate environmental impact of discarded cedar shakes depends heavily on the chosen disposal method, with landfilling contributing to a larger carbon footprint than other options. Composting is not typically feasible due to the size and density of the shakes, but responsible disposal methods such as chipping and mulching could help minimize waste.
Warranty and Guarantees
Understanding the warranty offered on custom cedar shake siding panels is crucial for ensuring long-term value and protection against defects. Manufacturers typically provide warranties covering various aspects of their products, from material defects to workmanship. However, the specifics can vary significantly, highlighting the importance of careful comparison before purchasing.
Typical Warranty Coverage
Cedar shake siding warranties generally cover defects in materials and manufacturing for a specific period. This typically includes issues like rot, splitting, and insect infestation arising from defects present at the time of manufacture. Some manufacturers might also offer warranties covering the installation process, if performed by a certified installer. The length of these warranties can range from 10 to 50 years, depending on the manufacturer and the specific type of warranty (e.g., limited warranty versus a full warranty). A limited warranty may cover only the replacement of defective materials, while a full warranty might cover both material replacement and labor costs associated with repairs.
Factors that May Void a Warranty
Several factors can lead to a manufacturer voiding a warranty. These commonly include improper installation (not following the manufacturer’s guidelines), damage caused by natural disasters (unless specifically covered by an extended warranty), neglect or improper maintenance (such as failing to treat the siding against rot and insects), and modifications made to the product without the manufacturer’s approval. Furthermore, using incompatible materials or products with the cedar shake siding can also invalidate the warranty. It’s crucial to meticulously follow the manufacturer’s instructions throughout the entire process, from installation to maintenance, to maintain warranty validity.
Comparison of Warranty Terms from Different Manufacturers
Warranty terms can differ substantially between manufacturers. A direct comparison is essential for making an informed purchasing decision. The following table illustrates potential variations:
| Manufacturer | Warranty Length (Years) | Coverage | Limitations |
|---|---|---|---|
| Manufacturer A | 25 | Material defects, rot, insect damage | Excludes damage from improper installation or acts of God. |
| Manufacturer B | 15 | Material defects | Does not cover labor costs for repairs. Limited to replacement of defective materials only. |
| Manufacturer C | 30 | Material defects, rot, insect damage, and installation (if installed by a certified installer) | Requires regular maintenance as outlined in the manufacturer’s guidelines. |
| Manufacturer D | 10 | Material defects only | No coverage for labor costs; excludes damage caused by improper maintenance. |
Safety Precautions
Installing cedar shake siding, while aesthetically pleasing, presents several potential hazards requiring careful attention to safety. This section details crucial precautions for both professional installers and DIY enthusiasts to ensure a safe and successful project. Ignoring these precautions can lead to serious injury or even fatality.
Working at Heights
Working at heights is inherently dangerous and presents significant risks, including falls. Falls from ladders, scaffolding, or roofs are a leading cause of serious injuries in construction. The severity of injuries sustained from a fall increases dramatically with the height of the fall. For example, a fall from a 10-foot ladder can result in broken bones, while a fall from a greater height can cause severe head trauma, spinal cord injuries, or even death. Before commencing any work at height, a thorough risk assessment must be conducted, and appropriate safety measures implemented. This includes using sturdy and properly secured ladders or scaffolding, wearing a safety harness connected to a secure anchor point, and ensuring a stable working platform.
Personal Protective Equipment (PPE)
The proper use of personal protective equipment (PPE) is paramount to minimizing risks. This includes, but is not limited to, safety glasses or goggles to protect eyes from flying debris, hearing protection to mitigate noise from power tools, work gloves to protect hands from cuts and splinters, and respiratory protection (e.g., a dust mask) to prevent inhalation of cedar dust, which can be an irritant. Furthermore, a hard hat should be worn at all times when working at heights or in areas where falling objects are a possibility. All PPE should be inspected regularly for damage and replaced as needed. Using worn or damaged PPE significantly reduces its effectiveness and compromises safety.
Safety Guidelines for Cedar Shake Siding Installation
Proper planning and adherence to safety guidelines are crucial for a safe installation.
- Always inspect tools and equipment before use to ensure they are in good working order and free from damage.
- Use appropriate safety equipment for all power tools, such as blade guards and safety switches.
- Maintain a clean and organized work area to prevent trips and falls.
- Never overload ladders or scaffolding, and always ensure they are properly secured.
- Be aware of overhead power lines and take necessary precautions to avoid contact.
- Take frequent breaks to avoid fatigue, which can increase the risk of accidents.
- If working with others, communicate clearly and coordinate tasks to prevent collisions or other mishaps.
- Never work alone at heights; always have a spotter or partner present.
- Follow all manufacturer’s instructions for tools and materials.
- In case of any accident or injury, immediately seek medical attention.
Popular Applications
Custom cedar shake siding offers a timeless appeal and enduring quality, making it a popular choice for a wide range of architectural styles and applications. Its versatility extends to diverse climates and settings, showcasing its adaptability and resilience.
Cedar shake siding’s natural beauty and durability contribute to its widespread use in various residential and commercial projects. The following sections detail its successful application across different architectural styles, climates, and project types.
Architectural Styles Suited to Cedar Shake Siding
Cedar shake siding complements numerous architectural styles, enhancing their aesthetic appeal. Its rustic charm is particularly well-suited to traditional styles like Craftsman, Cape Cod, and Shingle, where its texture and natural variations add depth and character. However, its adaptability extends to more modern designs, creating a striking contrast between natural materials and clean lines. For instance, a contemporary home with large windows and minimalist features can be beautifully accented by cedar shake siding, adding warmth and visual interest without compromising the modern aesthetic. The natural variations in color and texture of the cedar also lend themselves to rustic, farmhouse, and even some Scandinavian-inspired designs.
Cedar Shake Siding’s Climate Suitability
Cedar’s inherent properties contribute to its suitability for a variety of climates. Its natural resistance to decay and insect damage makes it a durable option in many regions. However, its performance can vary depending on specific climate conditions. In regions with high humidity and rainfall, proper installation and maintenance are crucial to prevent moisture issues. Regular cleaning and the application of a suitable sealant can significantly extend the lifespan of the siding in such environments. Conversely, in drier climates, cedar may require less frequent maintenance, although protection from prolonged sun exposure is still recommended to prevent premature fading. Cedar’s ability to breathe allows for proper ventilation, minimizing moisture buildup, even in more humid conditions. Nevertheless, appropriate overhangs and flashing are essential to protect the siding from direct water exposure regardless of the climate.
Successful Installations: Residential and Commercial Examples
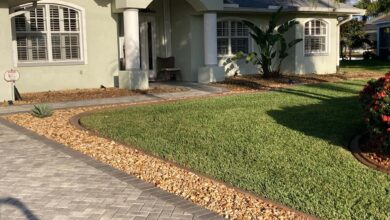
Residential applications showcase cedar shake siding’s versatility. Imagine a charming Craftsman-style home with exposed beams, wide porches, and carefully landscaped gardens. The cedar shake siding, in a rich, natural tone, complements the home’s overall design, creating a warm and inviting atmosphere. In contrast, a contemporary beach house might feature cedar shake siding in a lighter, more bleached-out finish, reflecting the surrounding natural environment. Commercial applications often leverage cedar’s rustic appeal. A boutique hotel in a mountain resort town, for instance, might use cedar shake siding to create a sense of rustic elegance and blend seamlessly with the natural surroundings. A high-end restaurant located in a rural setting might also employ this siding to enhance its ambiance and create a connection with the surrounding landscape.
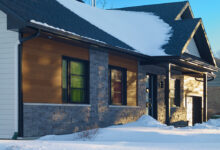
Modern Home with Cedar Shake Siding: A Visual Description
Picture a sleek, modern home with a pitched roof and expansive windows. The exterior walls are clad in custom cedar shake siding, exhibiting a range of natural tones from light gray to deep brown. The siding’s varied textures create a captivating interplay of light and shadow. The dark-stained cedar shake accents the clean lines of the home’s architectural design. Large, energy-efficient windows allow natural light to flood the interior, complementing the warm tones of the cedar. A minimalist landscaping scheme with native plants and gravel pathways enhances the home’s modern aesthetic while maintaining a harmonious connection with the surrounding environment. The overall effect is a striking blend of modern sophistication and natural warmth, showcasing the versatility of cedar shake siding in contemporary architecture.
Closing Notes
Ultimately, the decision to use custom cedar shake siding involves careful consideration of several factors, including budget, aesthetic preferences, and long-term maintenance commitments. However, the enduring beauty, natural durability, and inherent character of cedar make it a compelling choice for homeowners seeking a high-quality, sustainable, and visually striking exterior. This guide has aimed to provide a thorough understanding of all aspects, empowering you to make the best choice for your specific needs and project requirements.